How to Assemble a Gaming PC: Beginner’s Guide 2025 🖥️🎮
20 October 2025
Want to build your dream gaming PC but don’t know where to start? This step-by-step beginner-friendly guide will walk you through choosing parts, assembling components, cable management, and powering it on safely. Learn to build a gaming setup that looks great, runs smooth, and feels personal - all in 2025 style.
Building your own gaming PC is one of the best experiences for any gamer. That moment when you hit the power button and see your custom rig come alive is unbeatable. But if you’re new, assembling a PC can seem overwhelming - from choosing the right parts to handling delicate components. Don’t worry! This guide is made for beginners in 2025, with simple, clear steps to help you build a powerful, efficient, and great-looking gaming PC.
Step-by-Step Guide to Assembling Your First Gaming PC (2025 Edition) 🔧🎮
- Choose the Right Components →
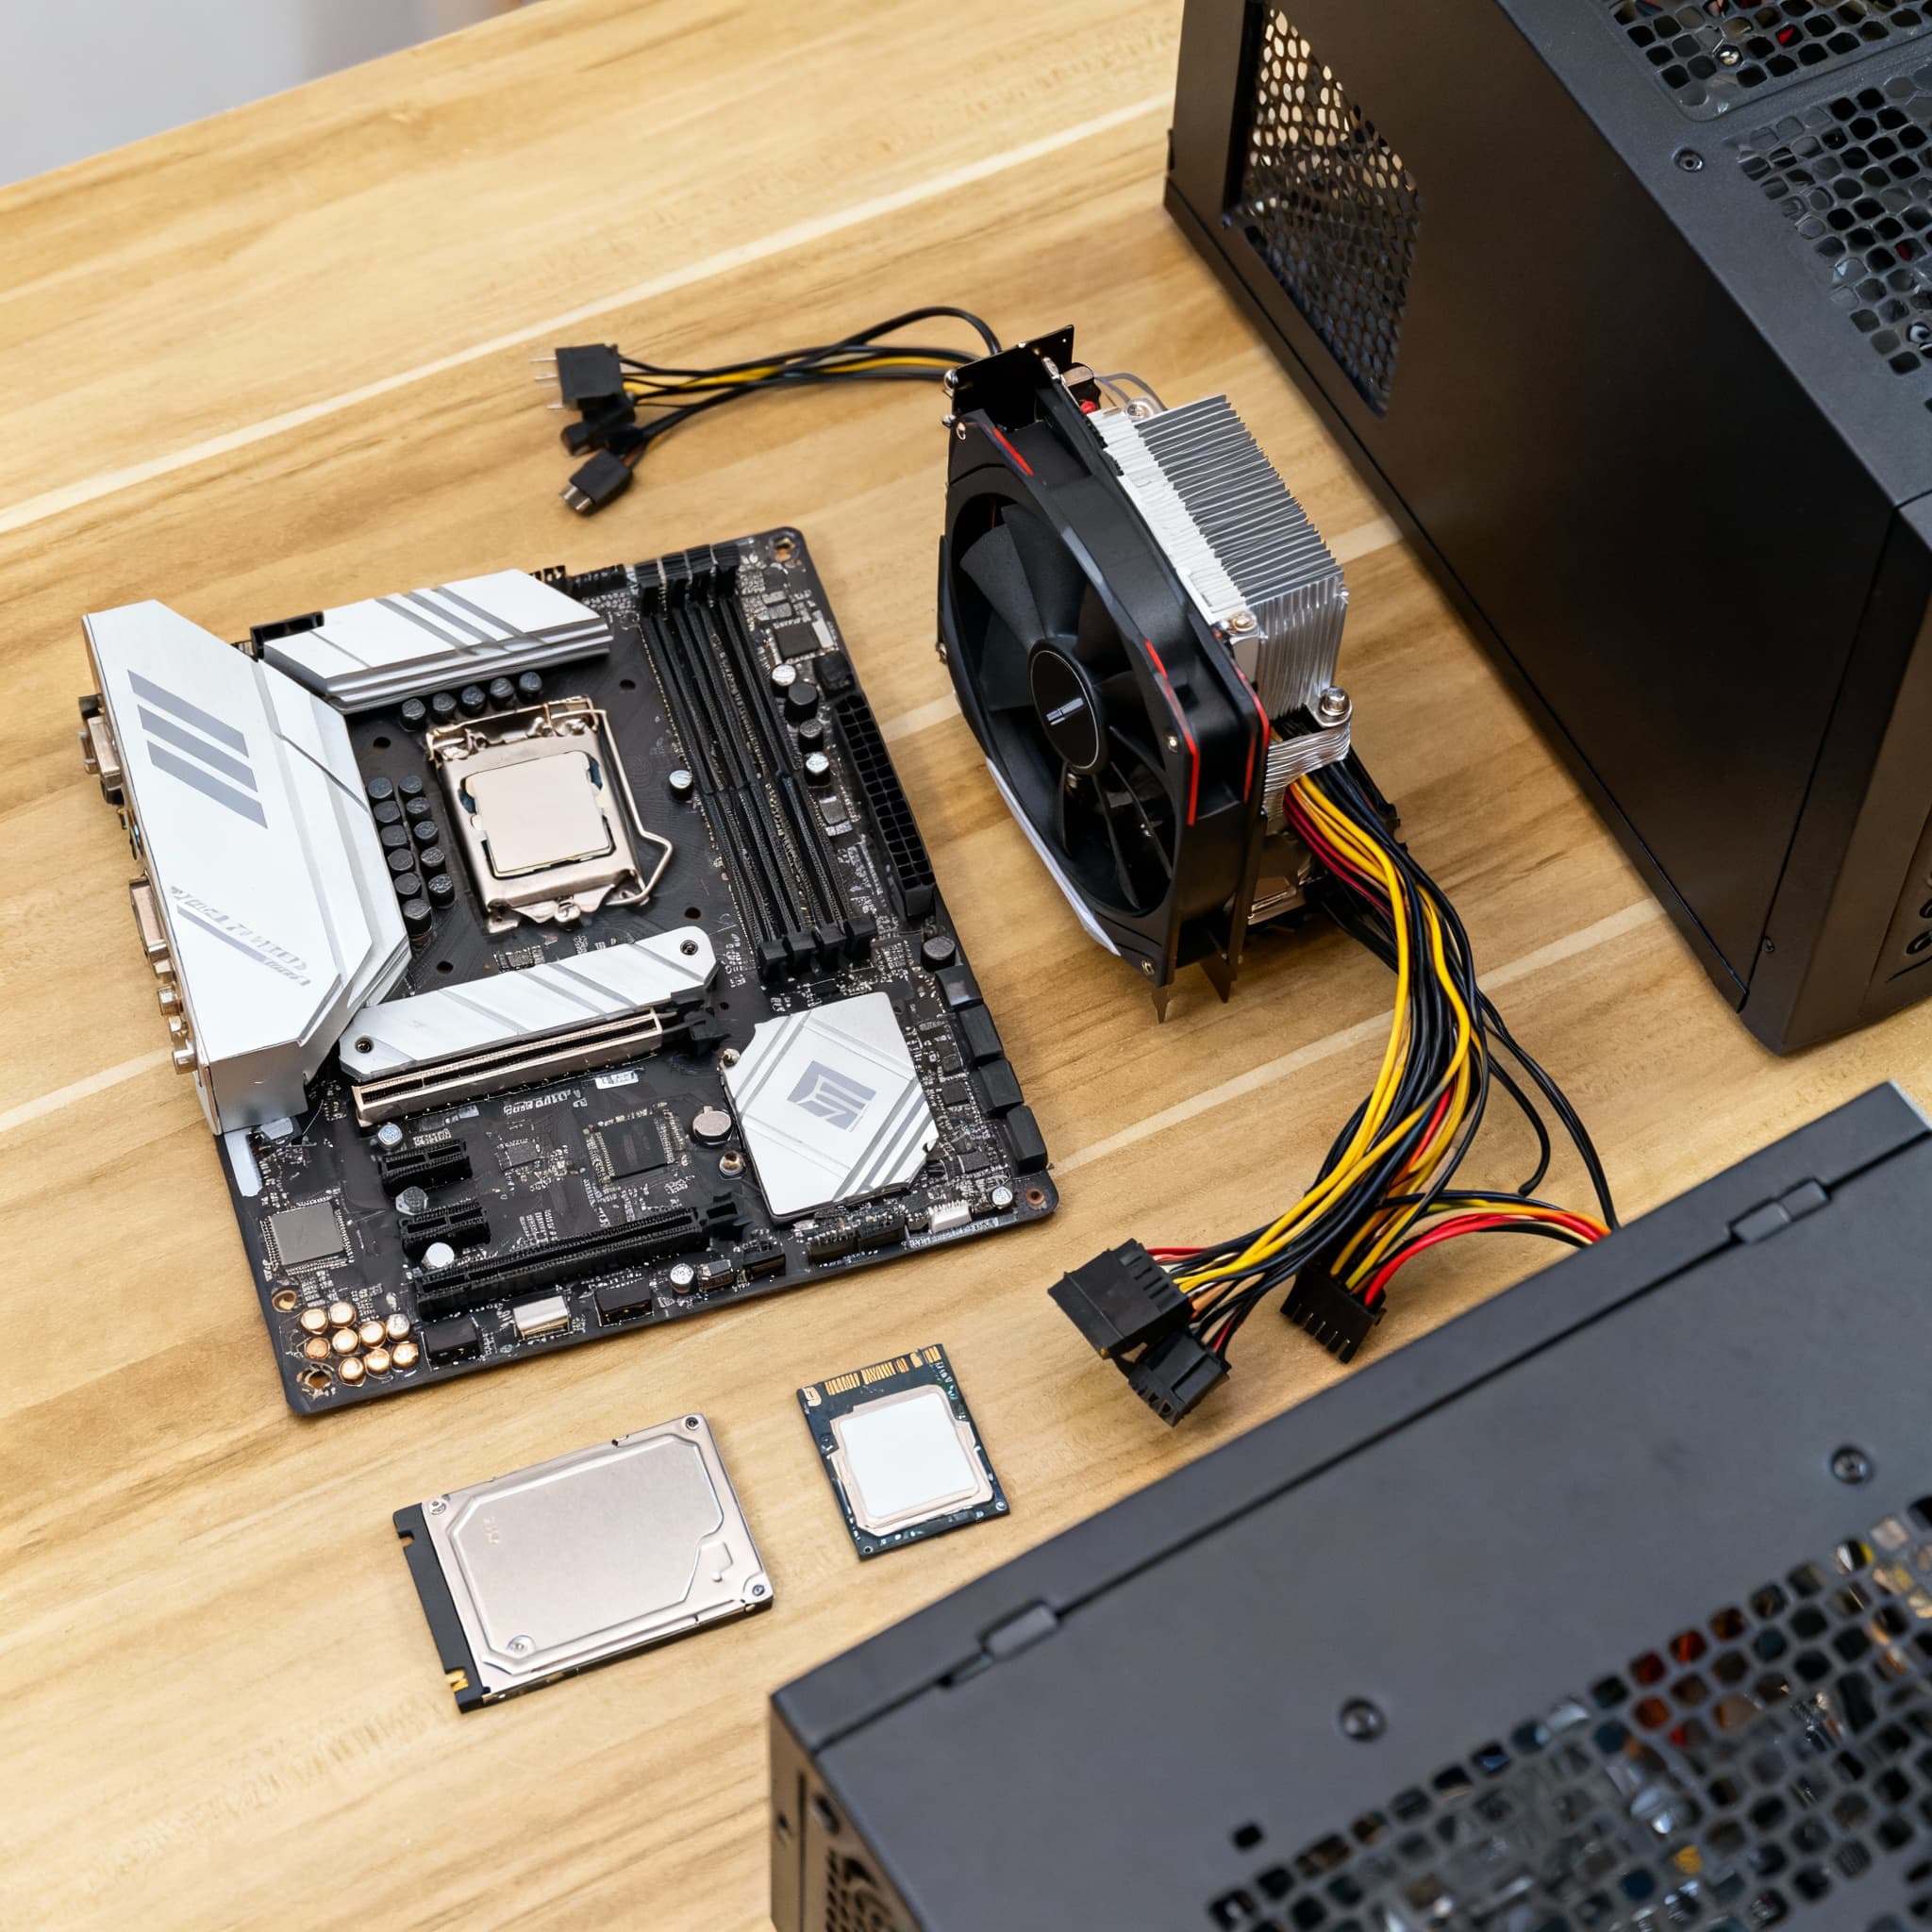
Before you start building, make sure your parts work well together. Choose a CPU, GPU, motherboard, RAM, storage, PSU, and case that fit your budget and gaming needs. Using online PC builders or compatibility tools can really help avoid costly mistakes. Think of this like gathering ingredients for a great recipe - every piece matters.
- Set Up Your Workspace →
Find a clean, flat surface with good lighting. Ground yourself by touching metal or using an anti-static wrist strap to avoid static damage. Get your tools ready - a screwdriver and some zip ties will do. Having a tidy workspace makes the build smoother and keeps things from getting lost.
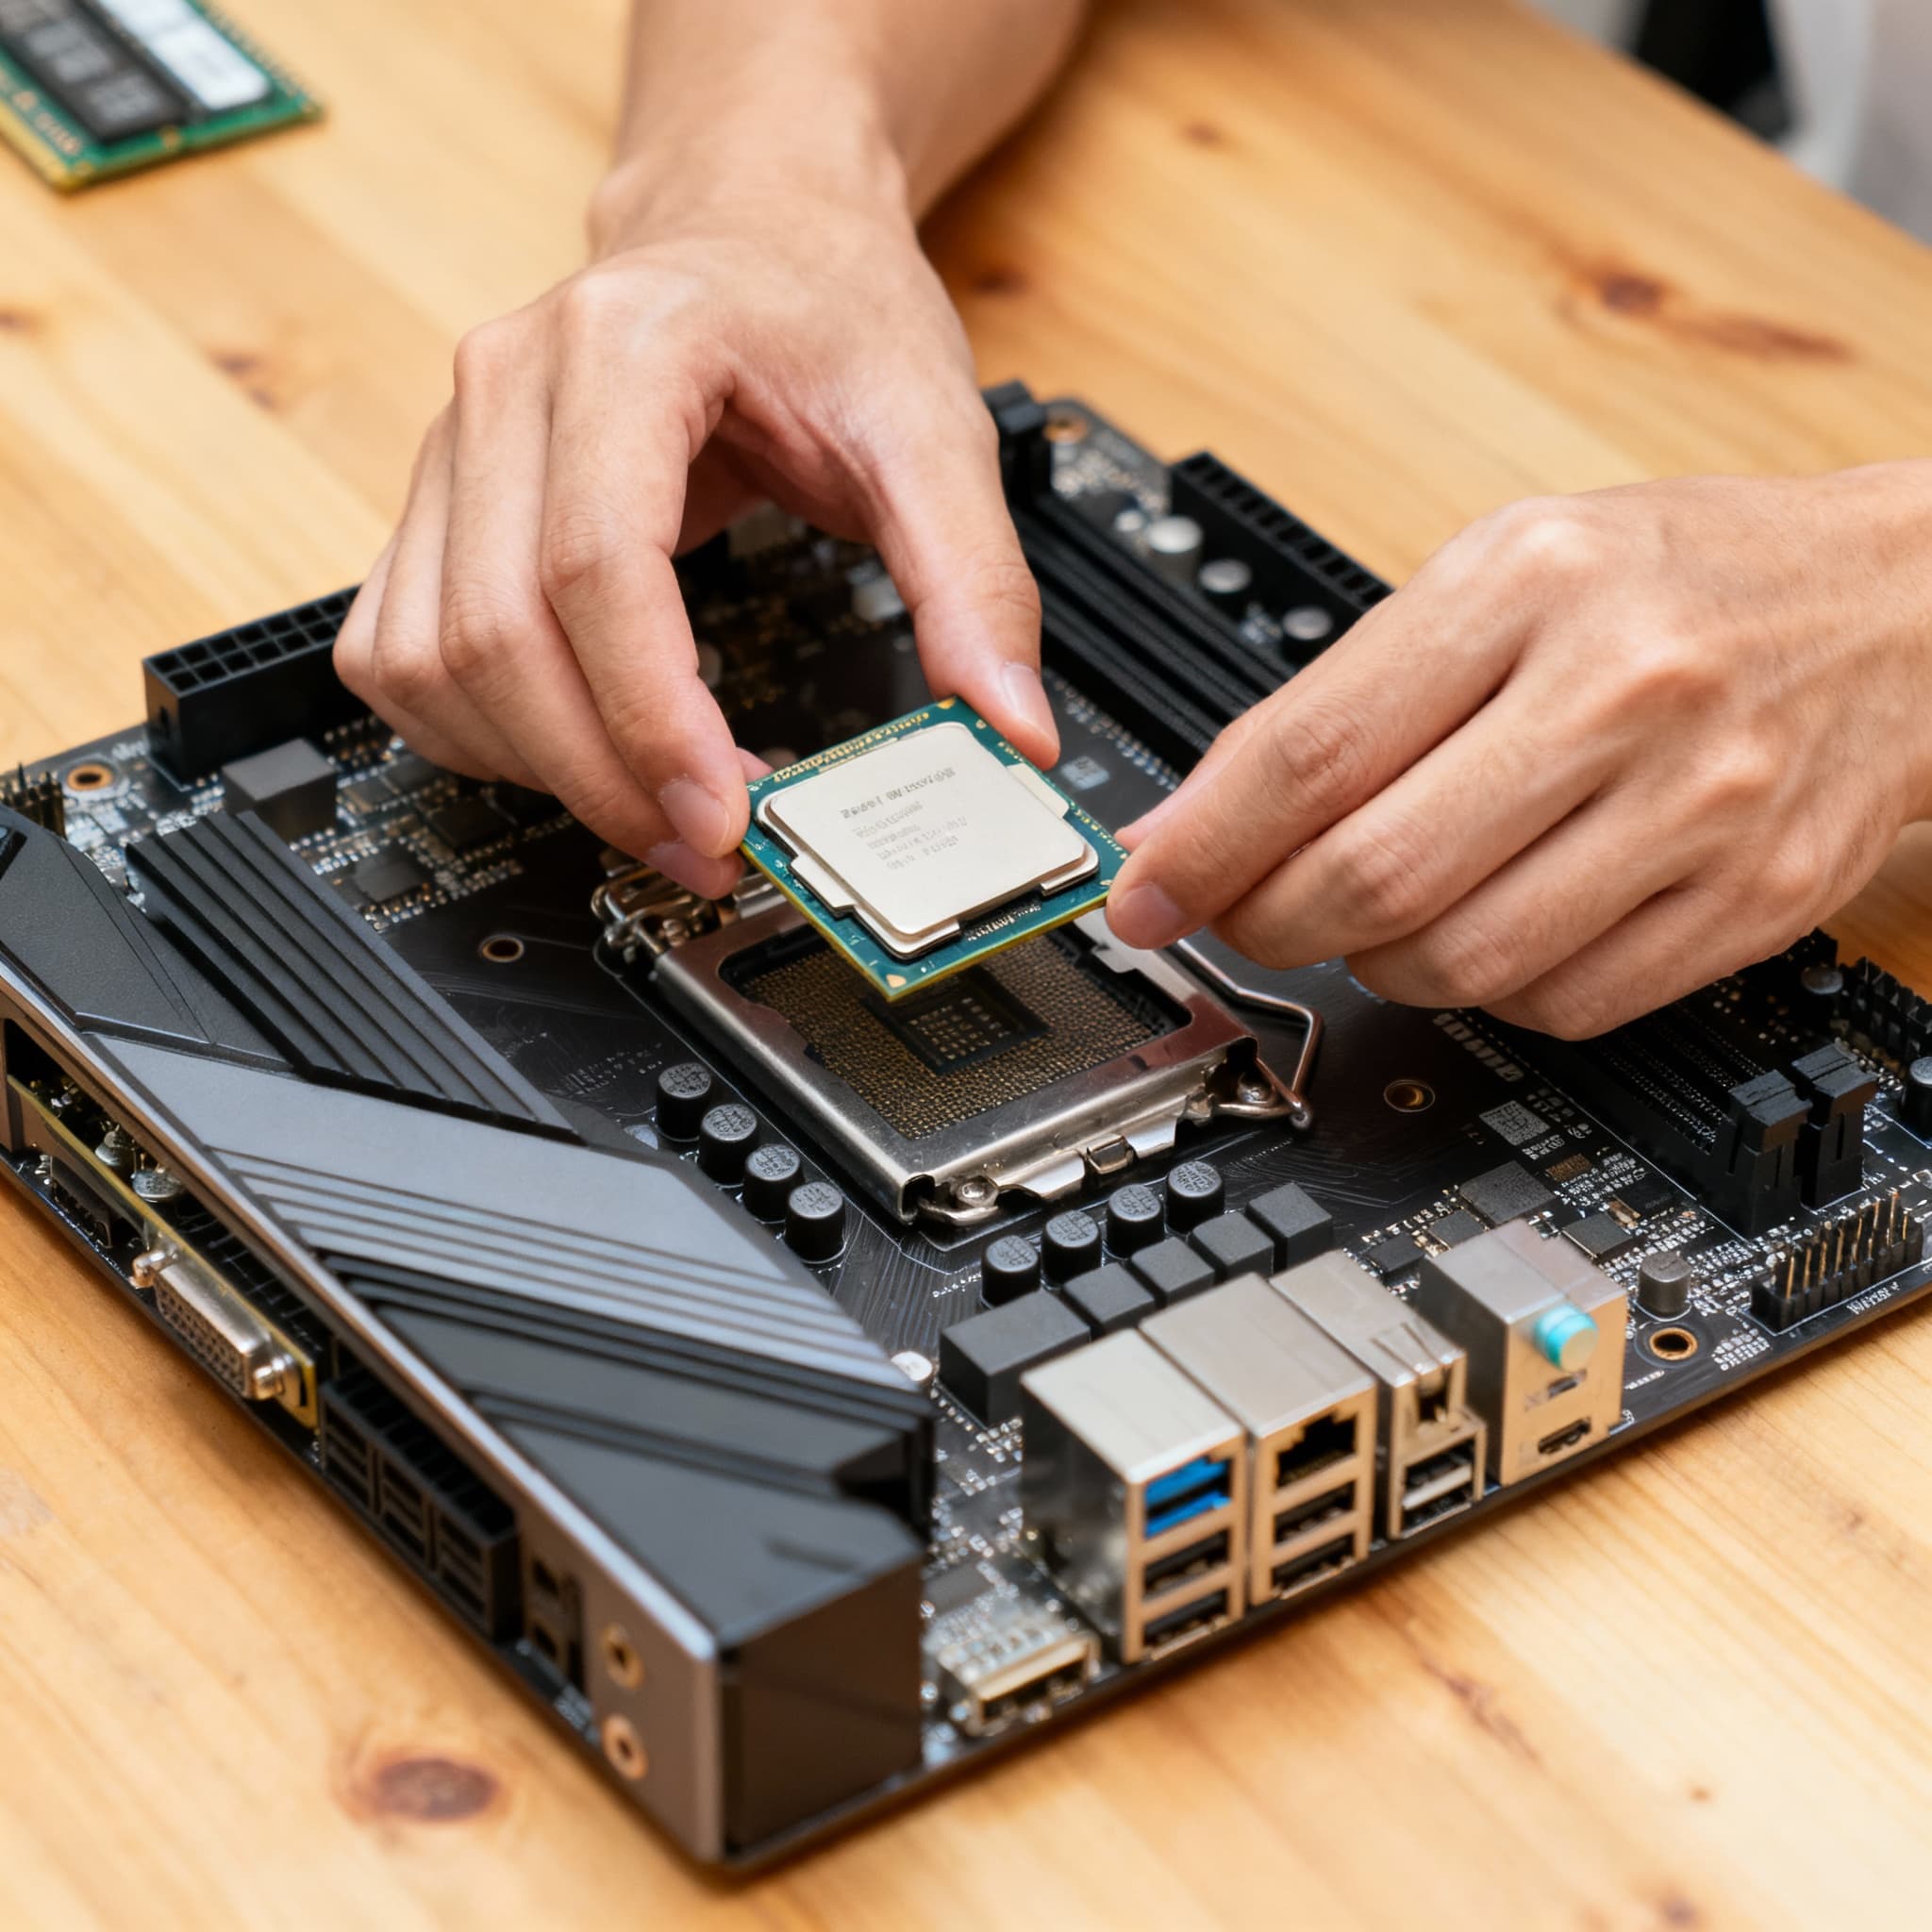
- Install the CPU on the Motherboard →
Open the CPU socket lever, line up the CPU with the marked corner, and gently place it in. Close the lever carefully - don’t force it! When the CPU fits perfectly, you’ll feel a little win and be ready for the next step.
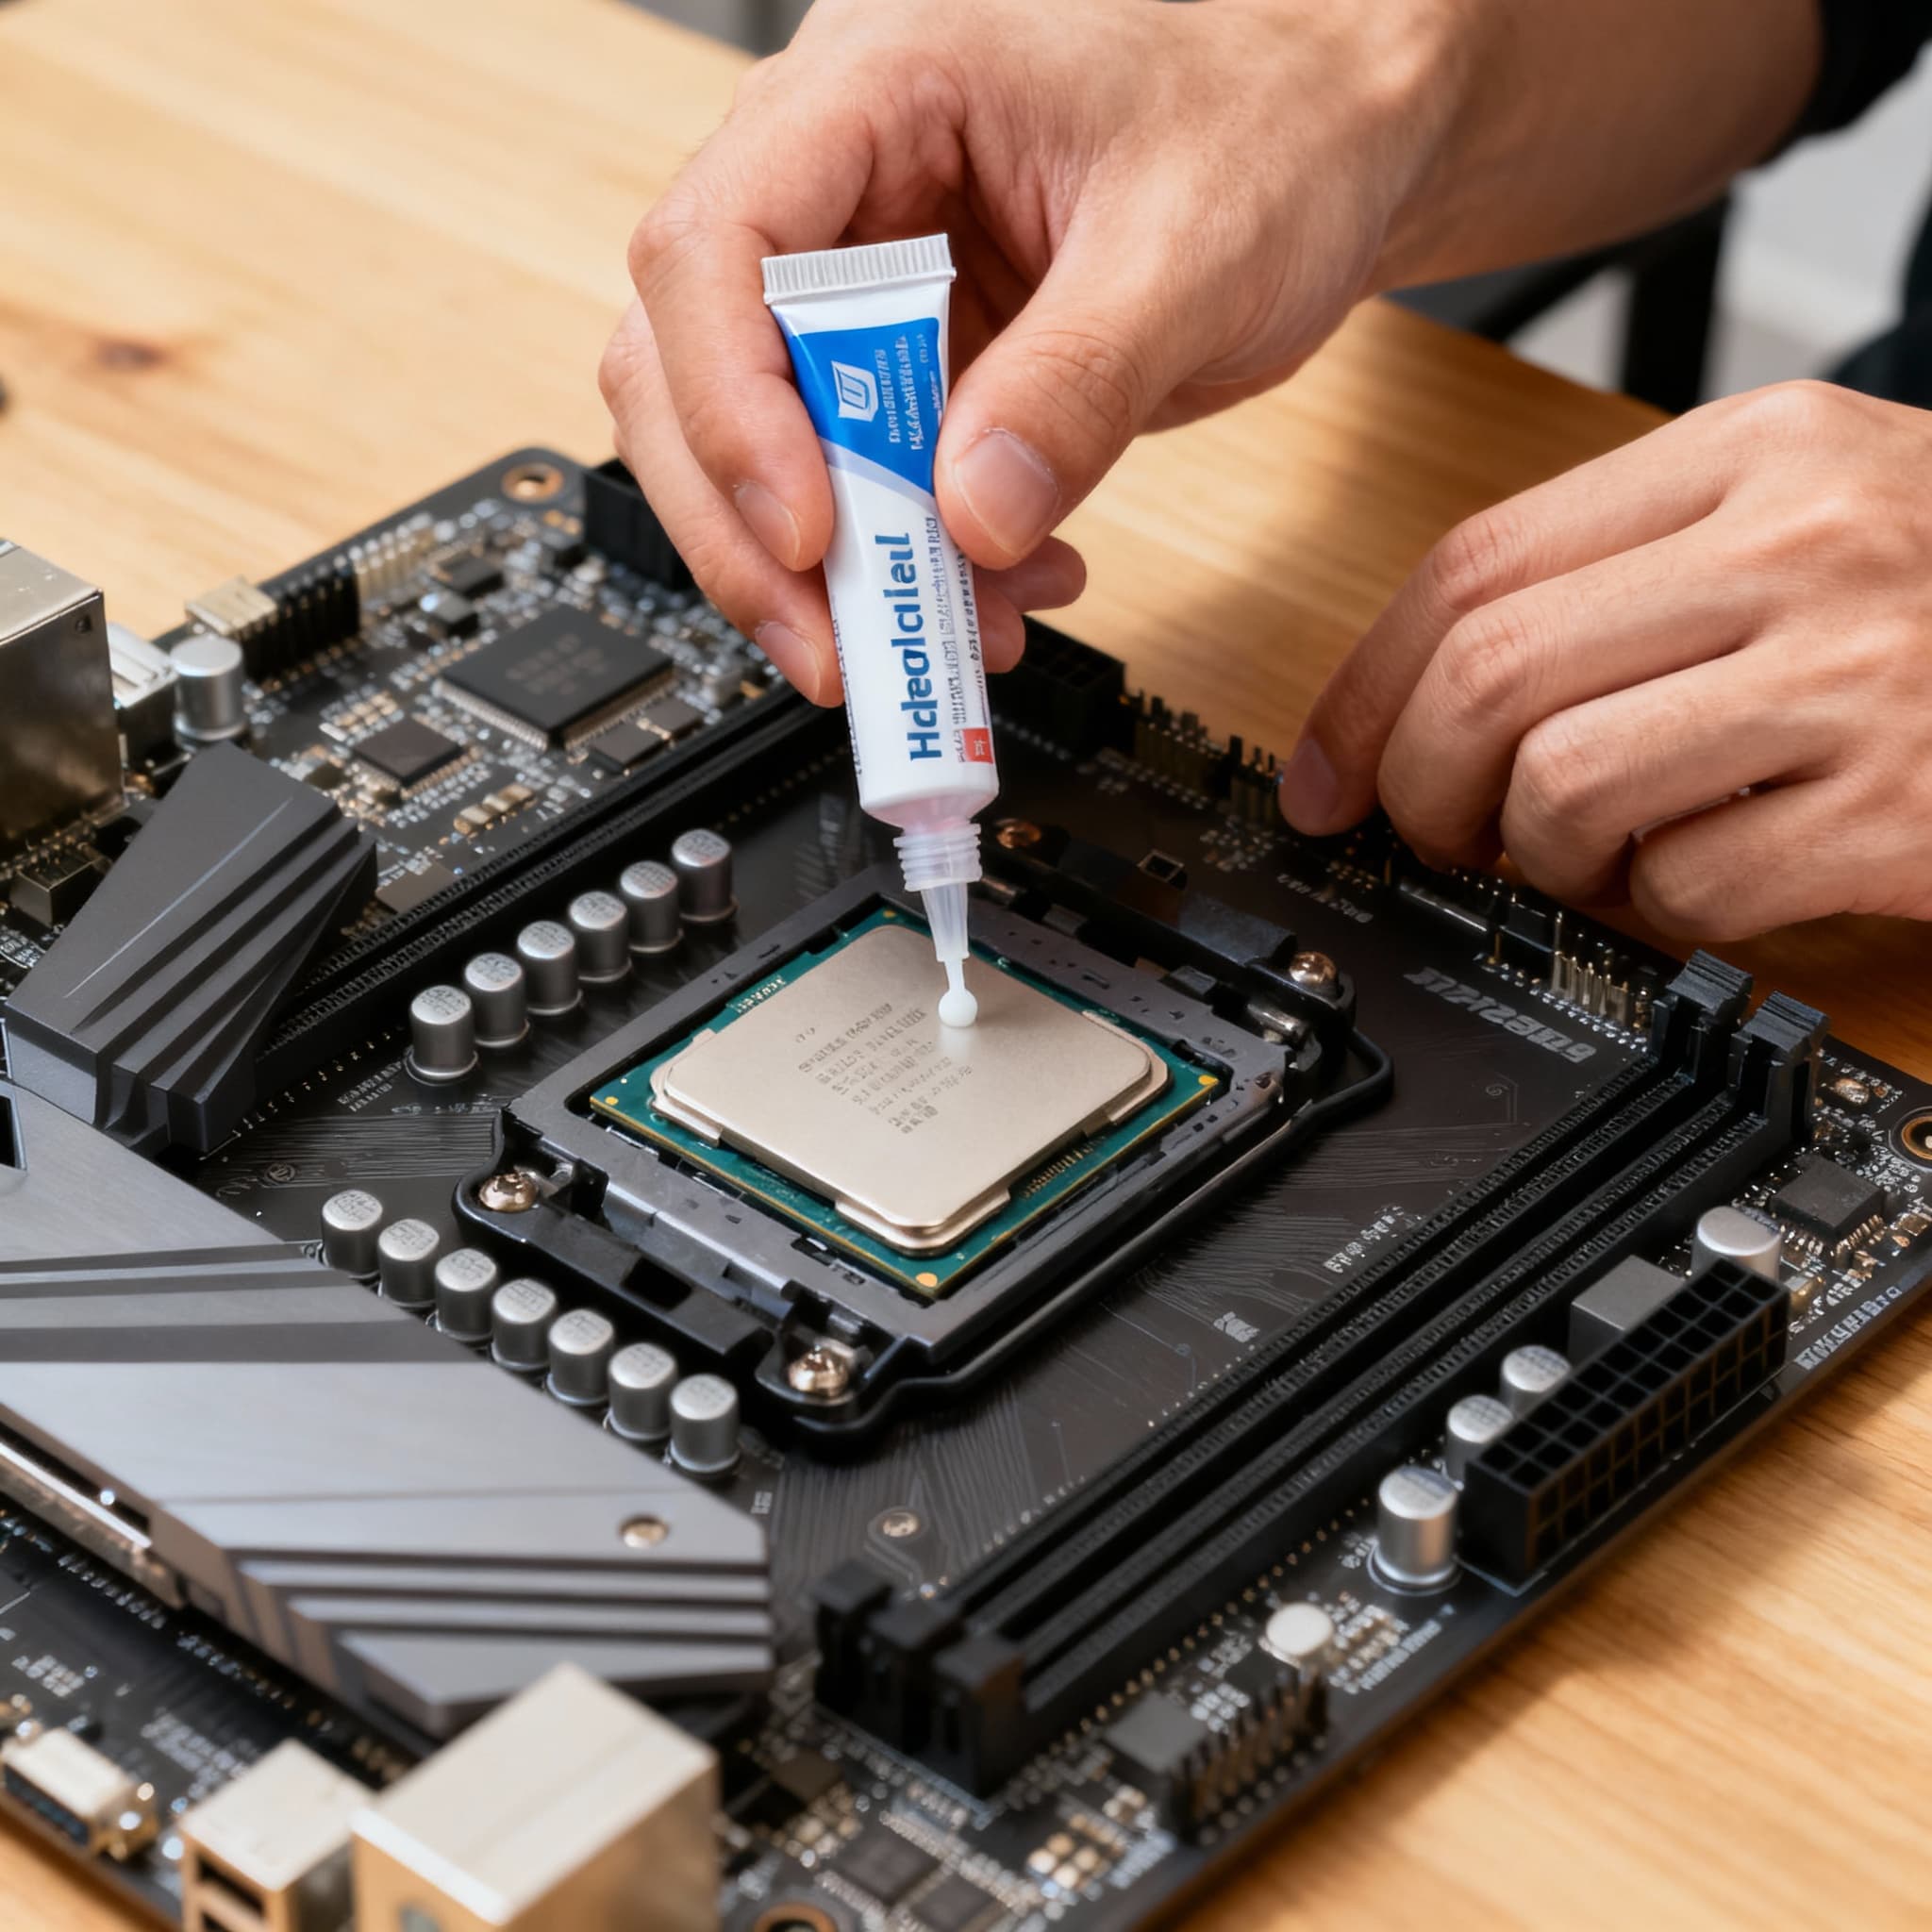
- Apply thermal paste correctly (Don’t overdo it!) →
Thermal paste helps your CPU stay cool by filling tiny gaps between it and the cooler. If you need to, clean off old paste with isopropyl alcohol first. Then, put a small pea-sized dot in the center - that’s enough. The pressure of the cooler will spread it evenly. Avoid spreading it yourself or using too much, as that can cause problems.
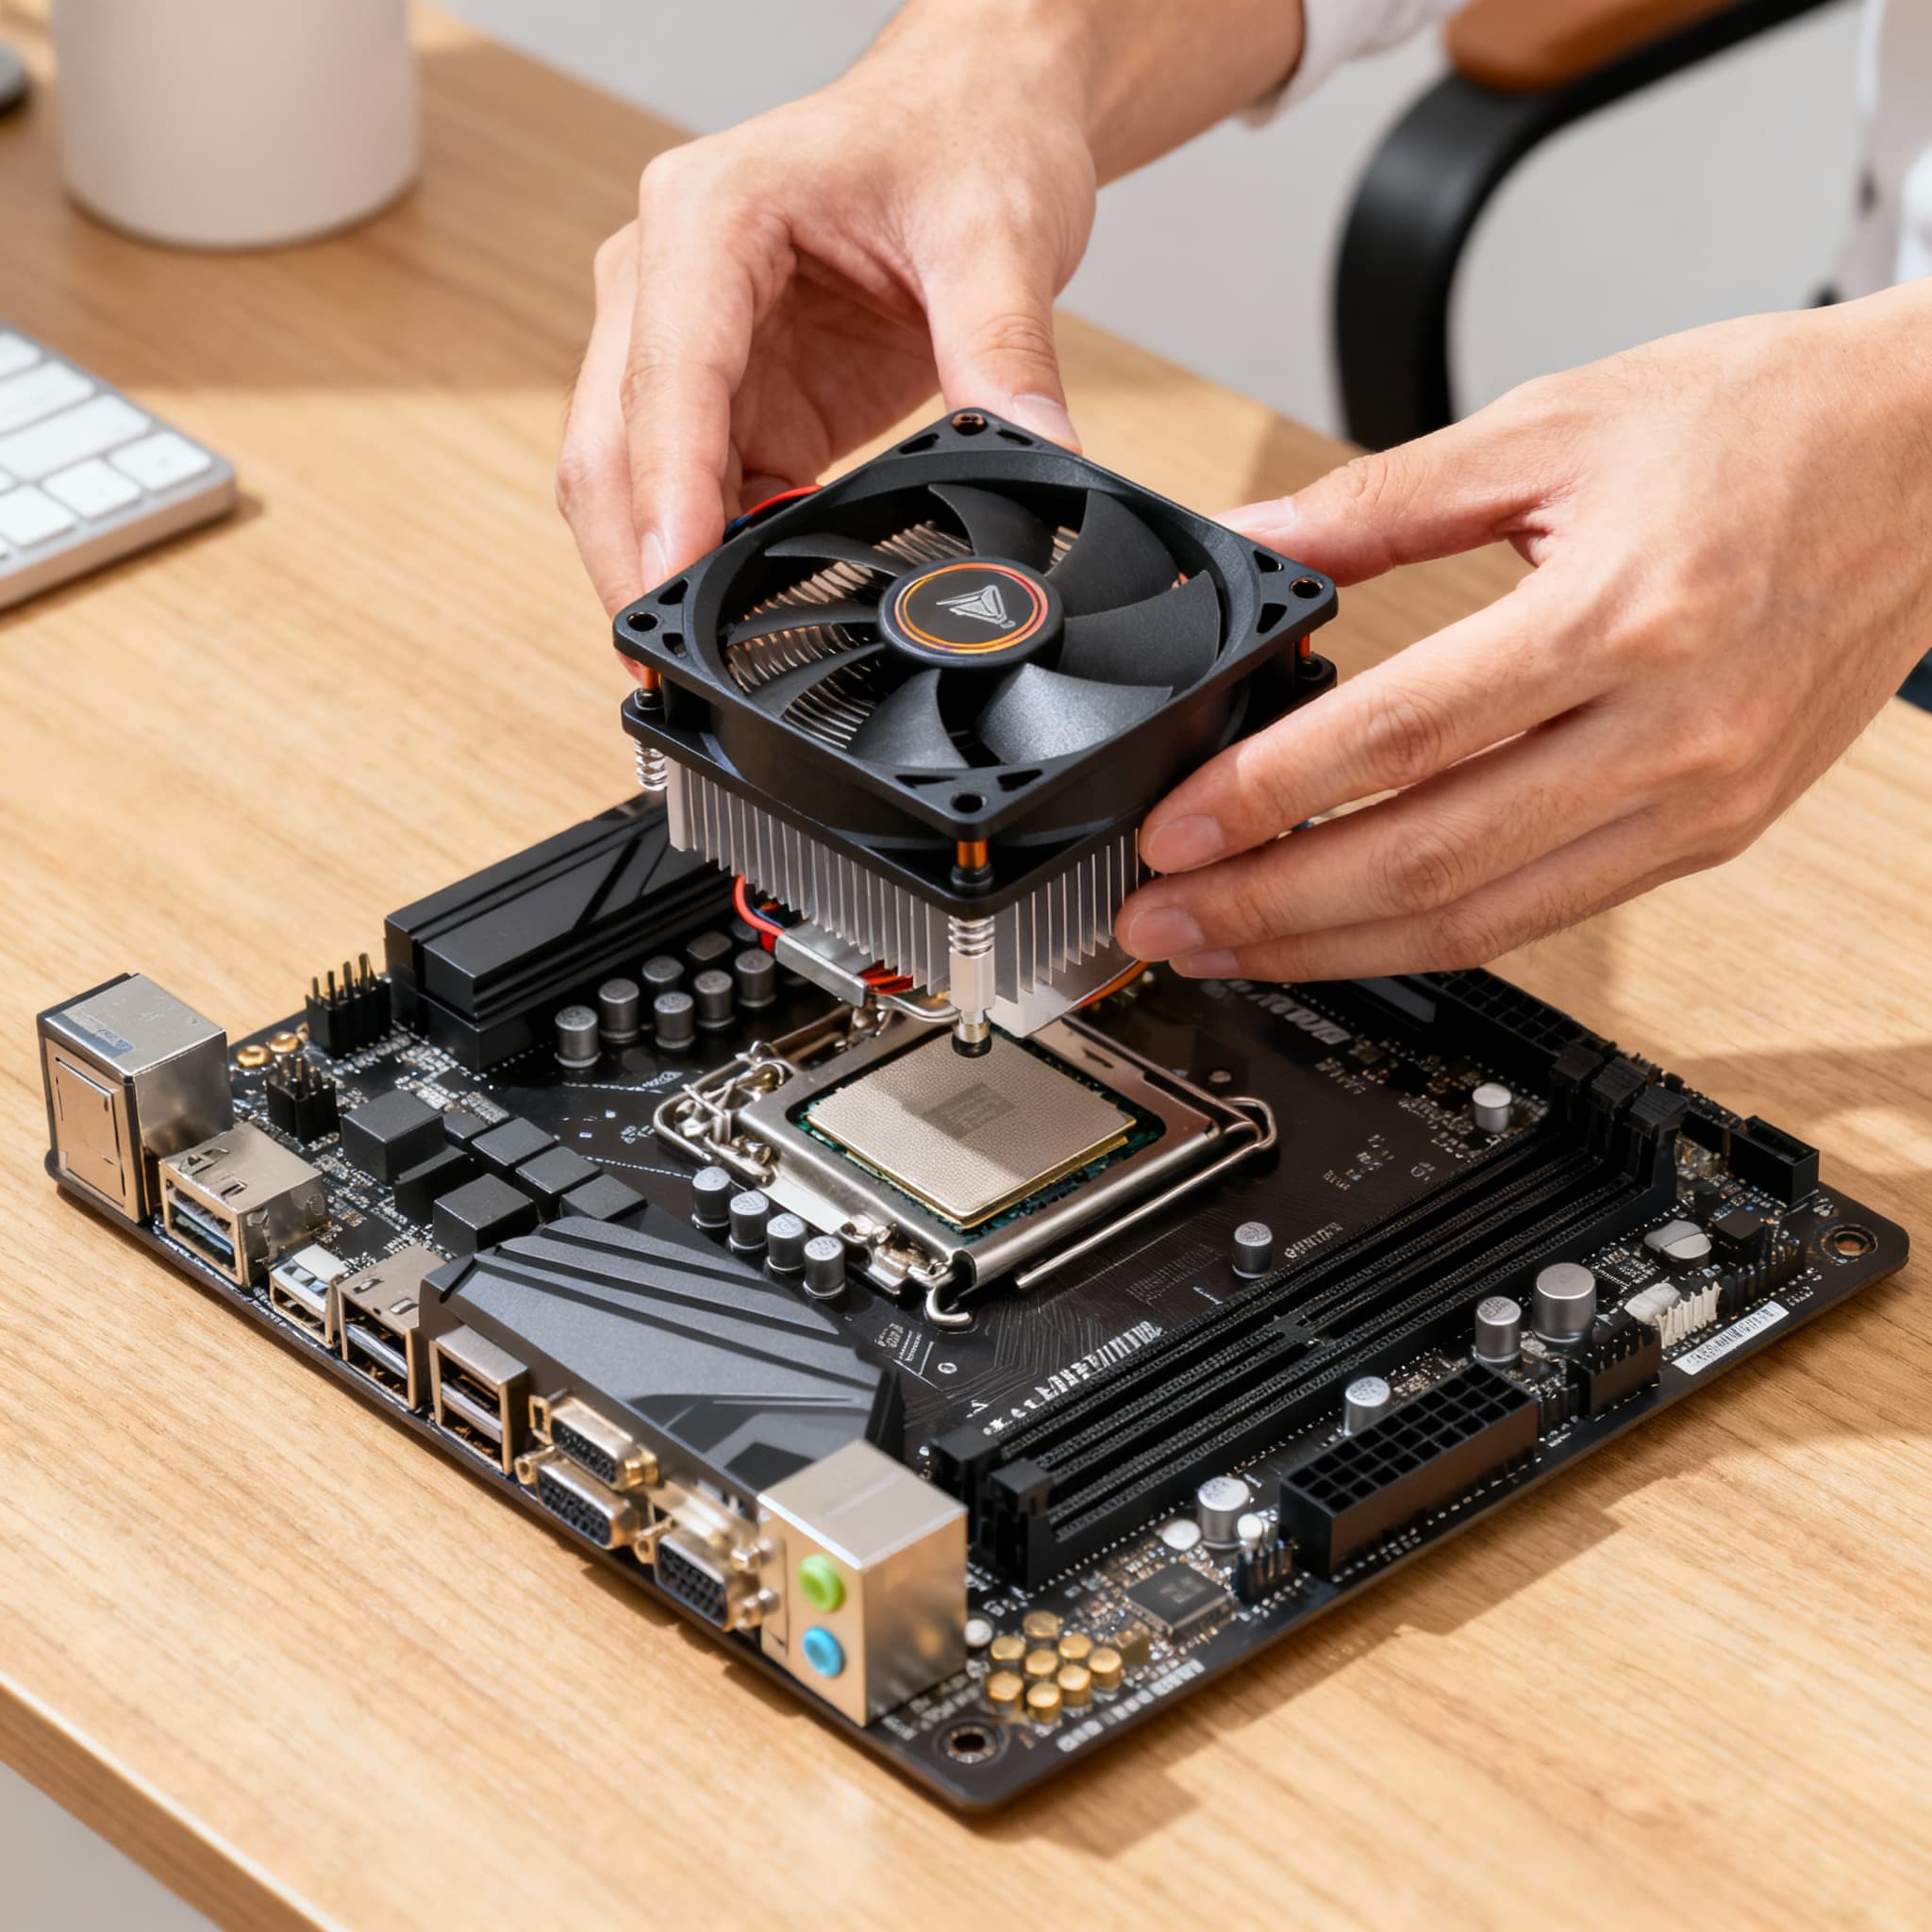
- Install the CPU Cooler →
Whether stock or aftermarket, attach the cooler according to the instructions. Secure it gently to avoid damaging the motherboard. A properly mounted cooler keeps your CPU temperatures low and performance high - and nothing feels better than a quiet, efficient rig.
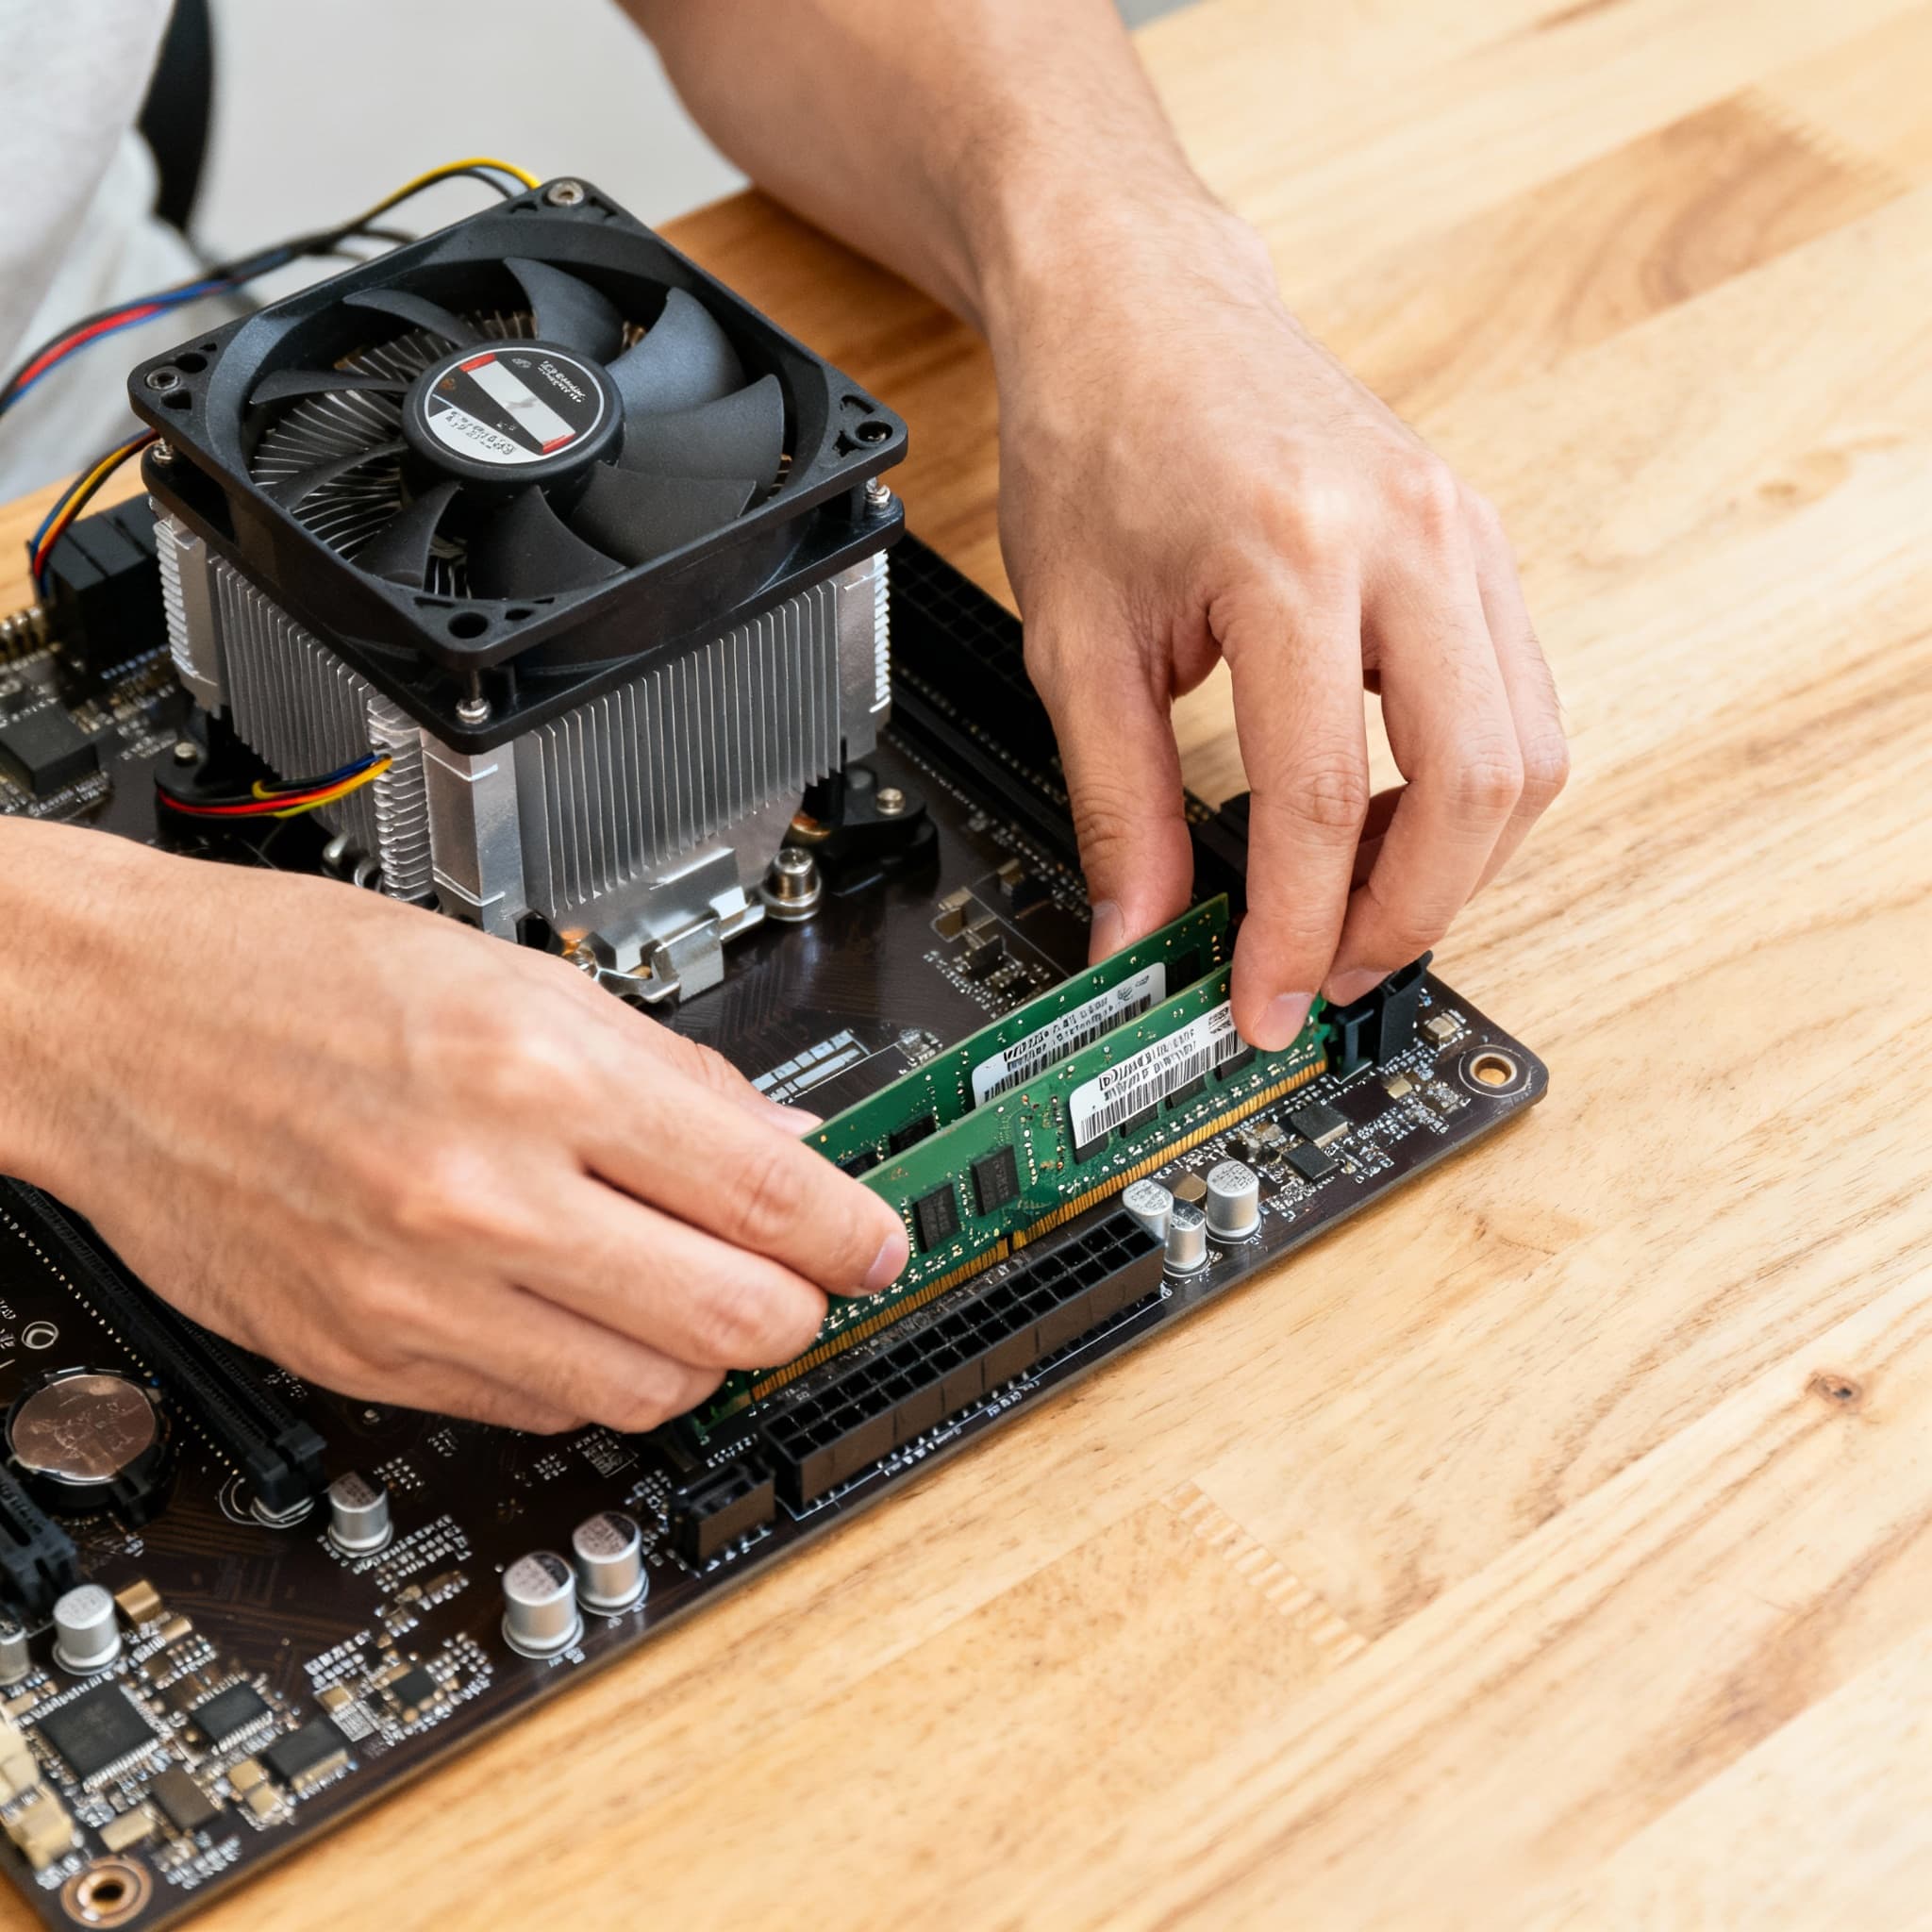
- Install RAM Modules →
Open the RAM slots on the motherboard and align your memory sticks. Press firmly until the clips click. Many motherboards have color-coded slots if you want dual-channel speed. Hearing that click is satisfying and means your PC is almost ready for fast gaming.
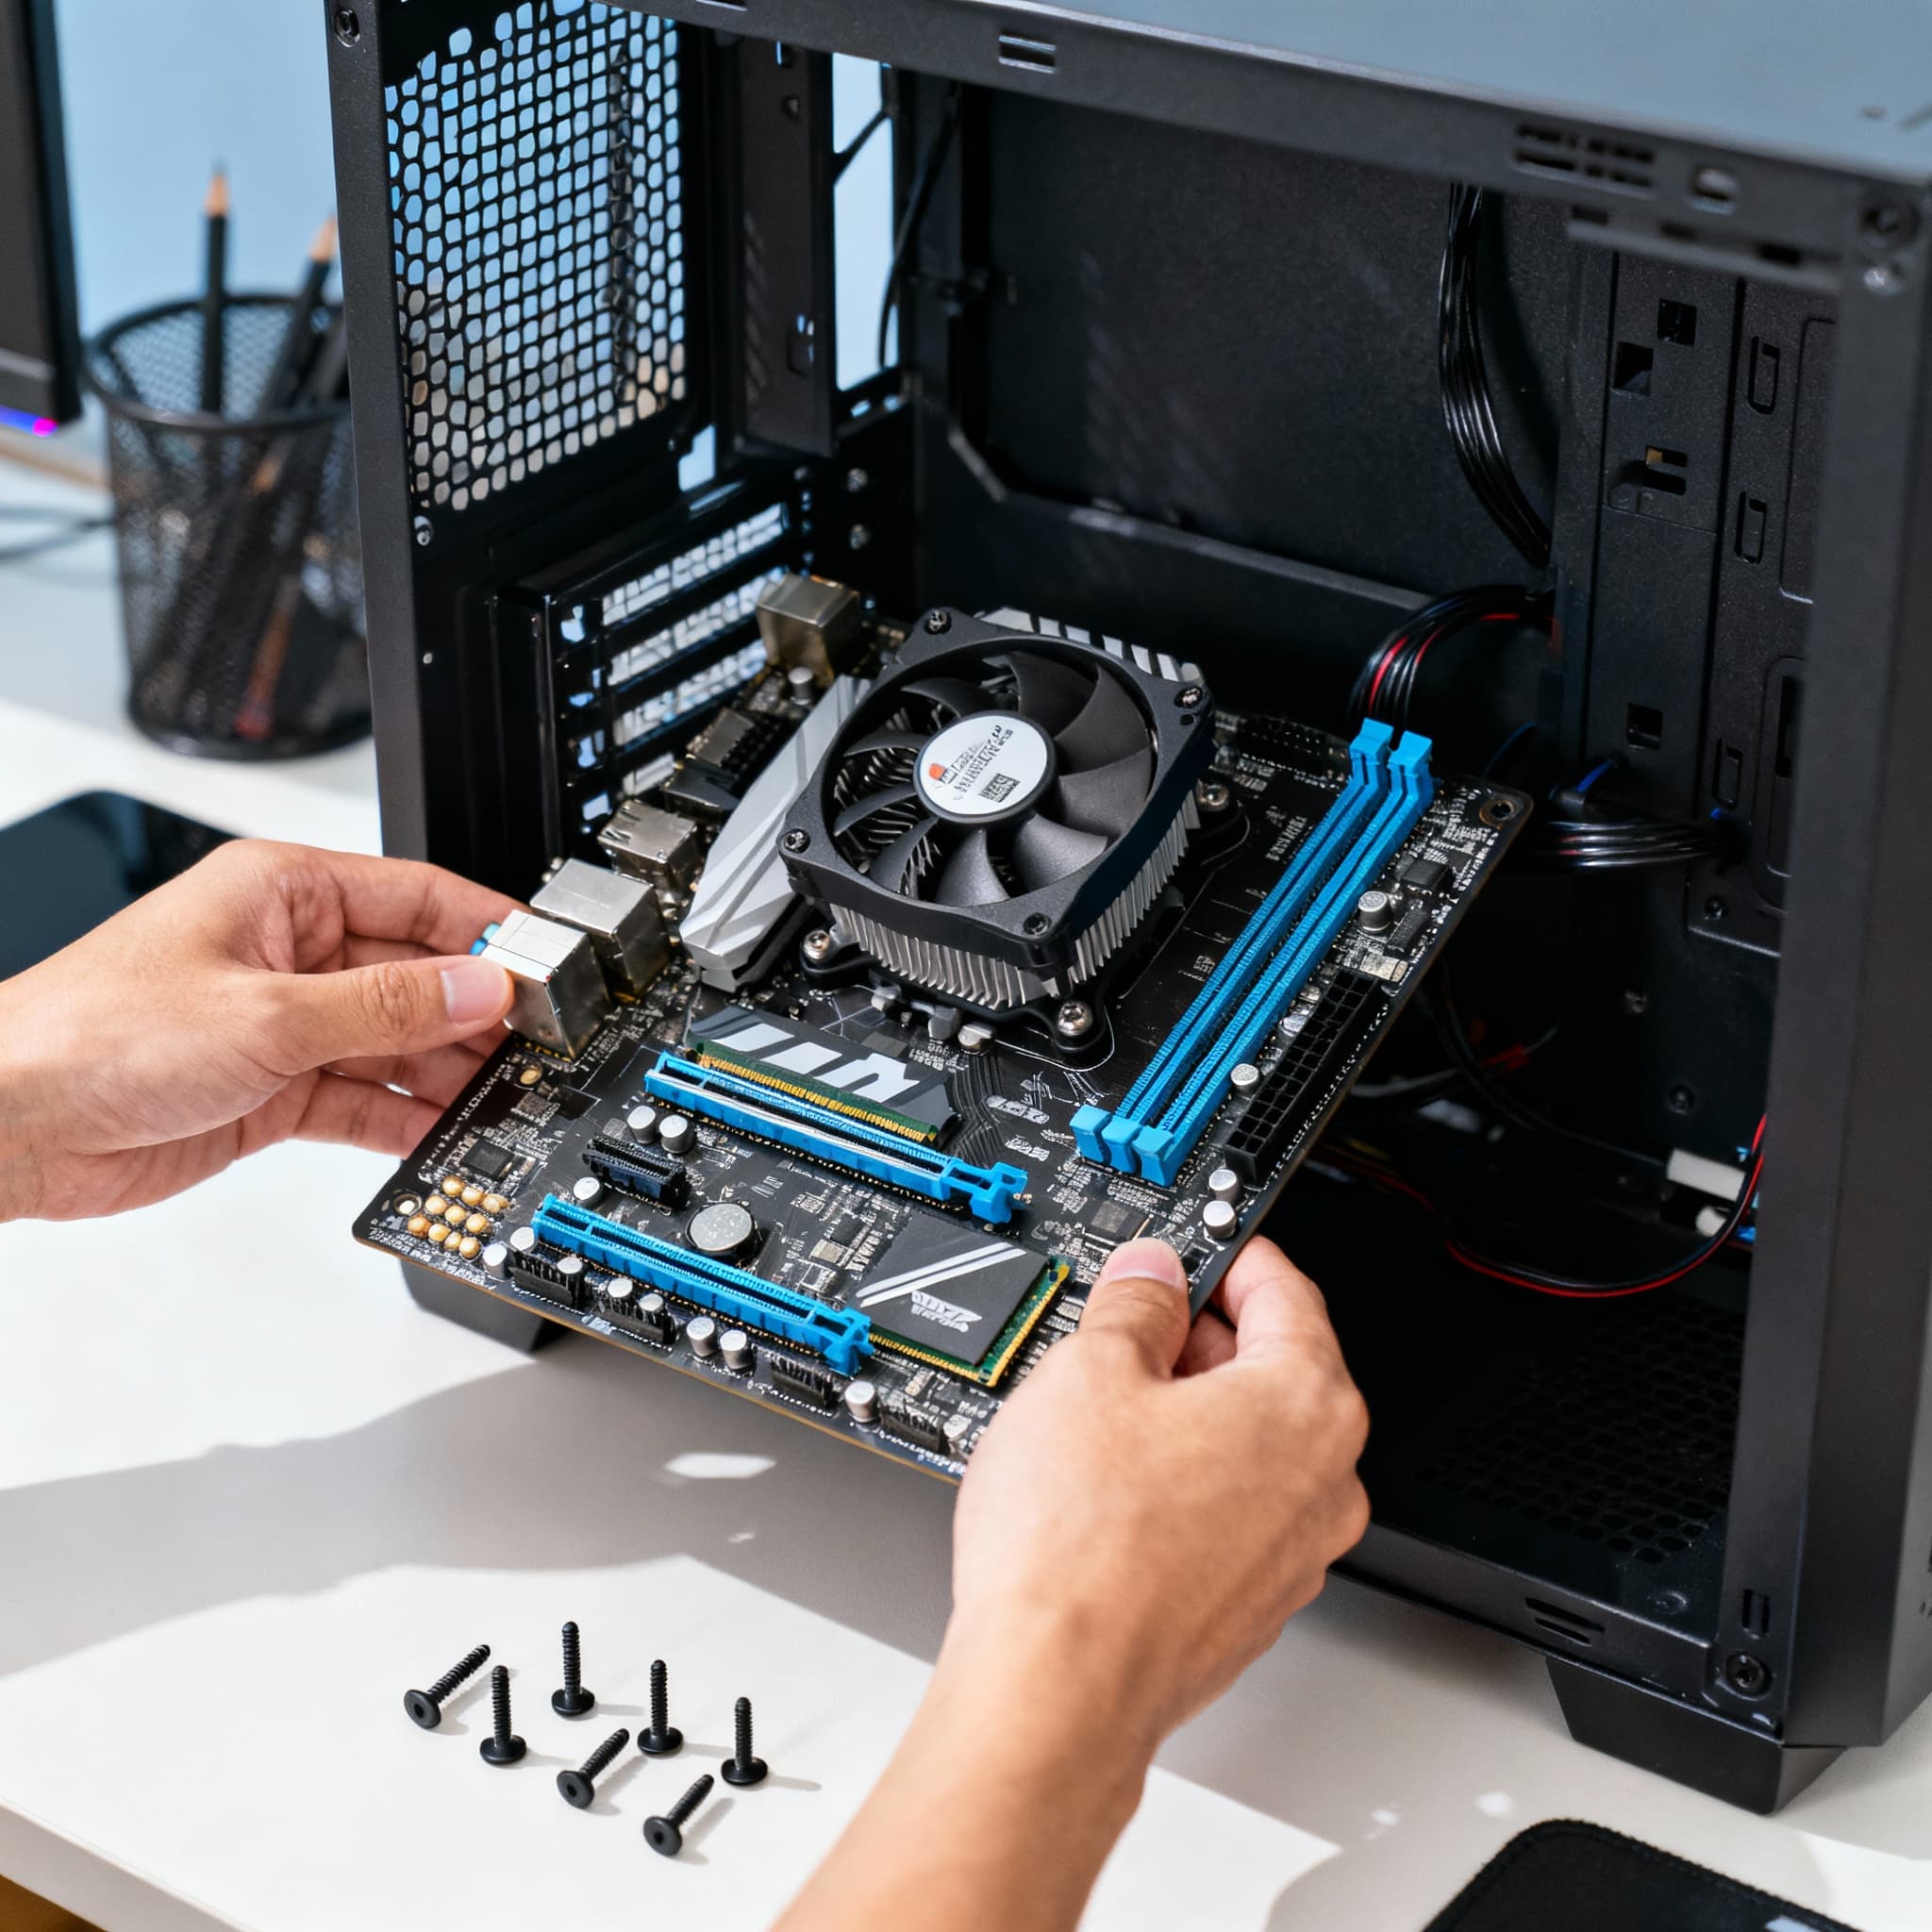
- Mount the Motherboard in the Case →
Insert the motherboard into the case, aligning it with the standoffs and I/O shield. Secure with screws, but don’t overtighten. The motherboard is the heart of your PC, so handle it with care. Seeing it secured in your case makes the build start to feel real and exciting.
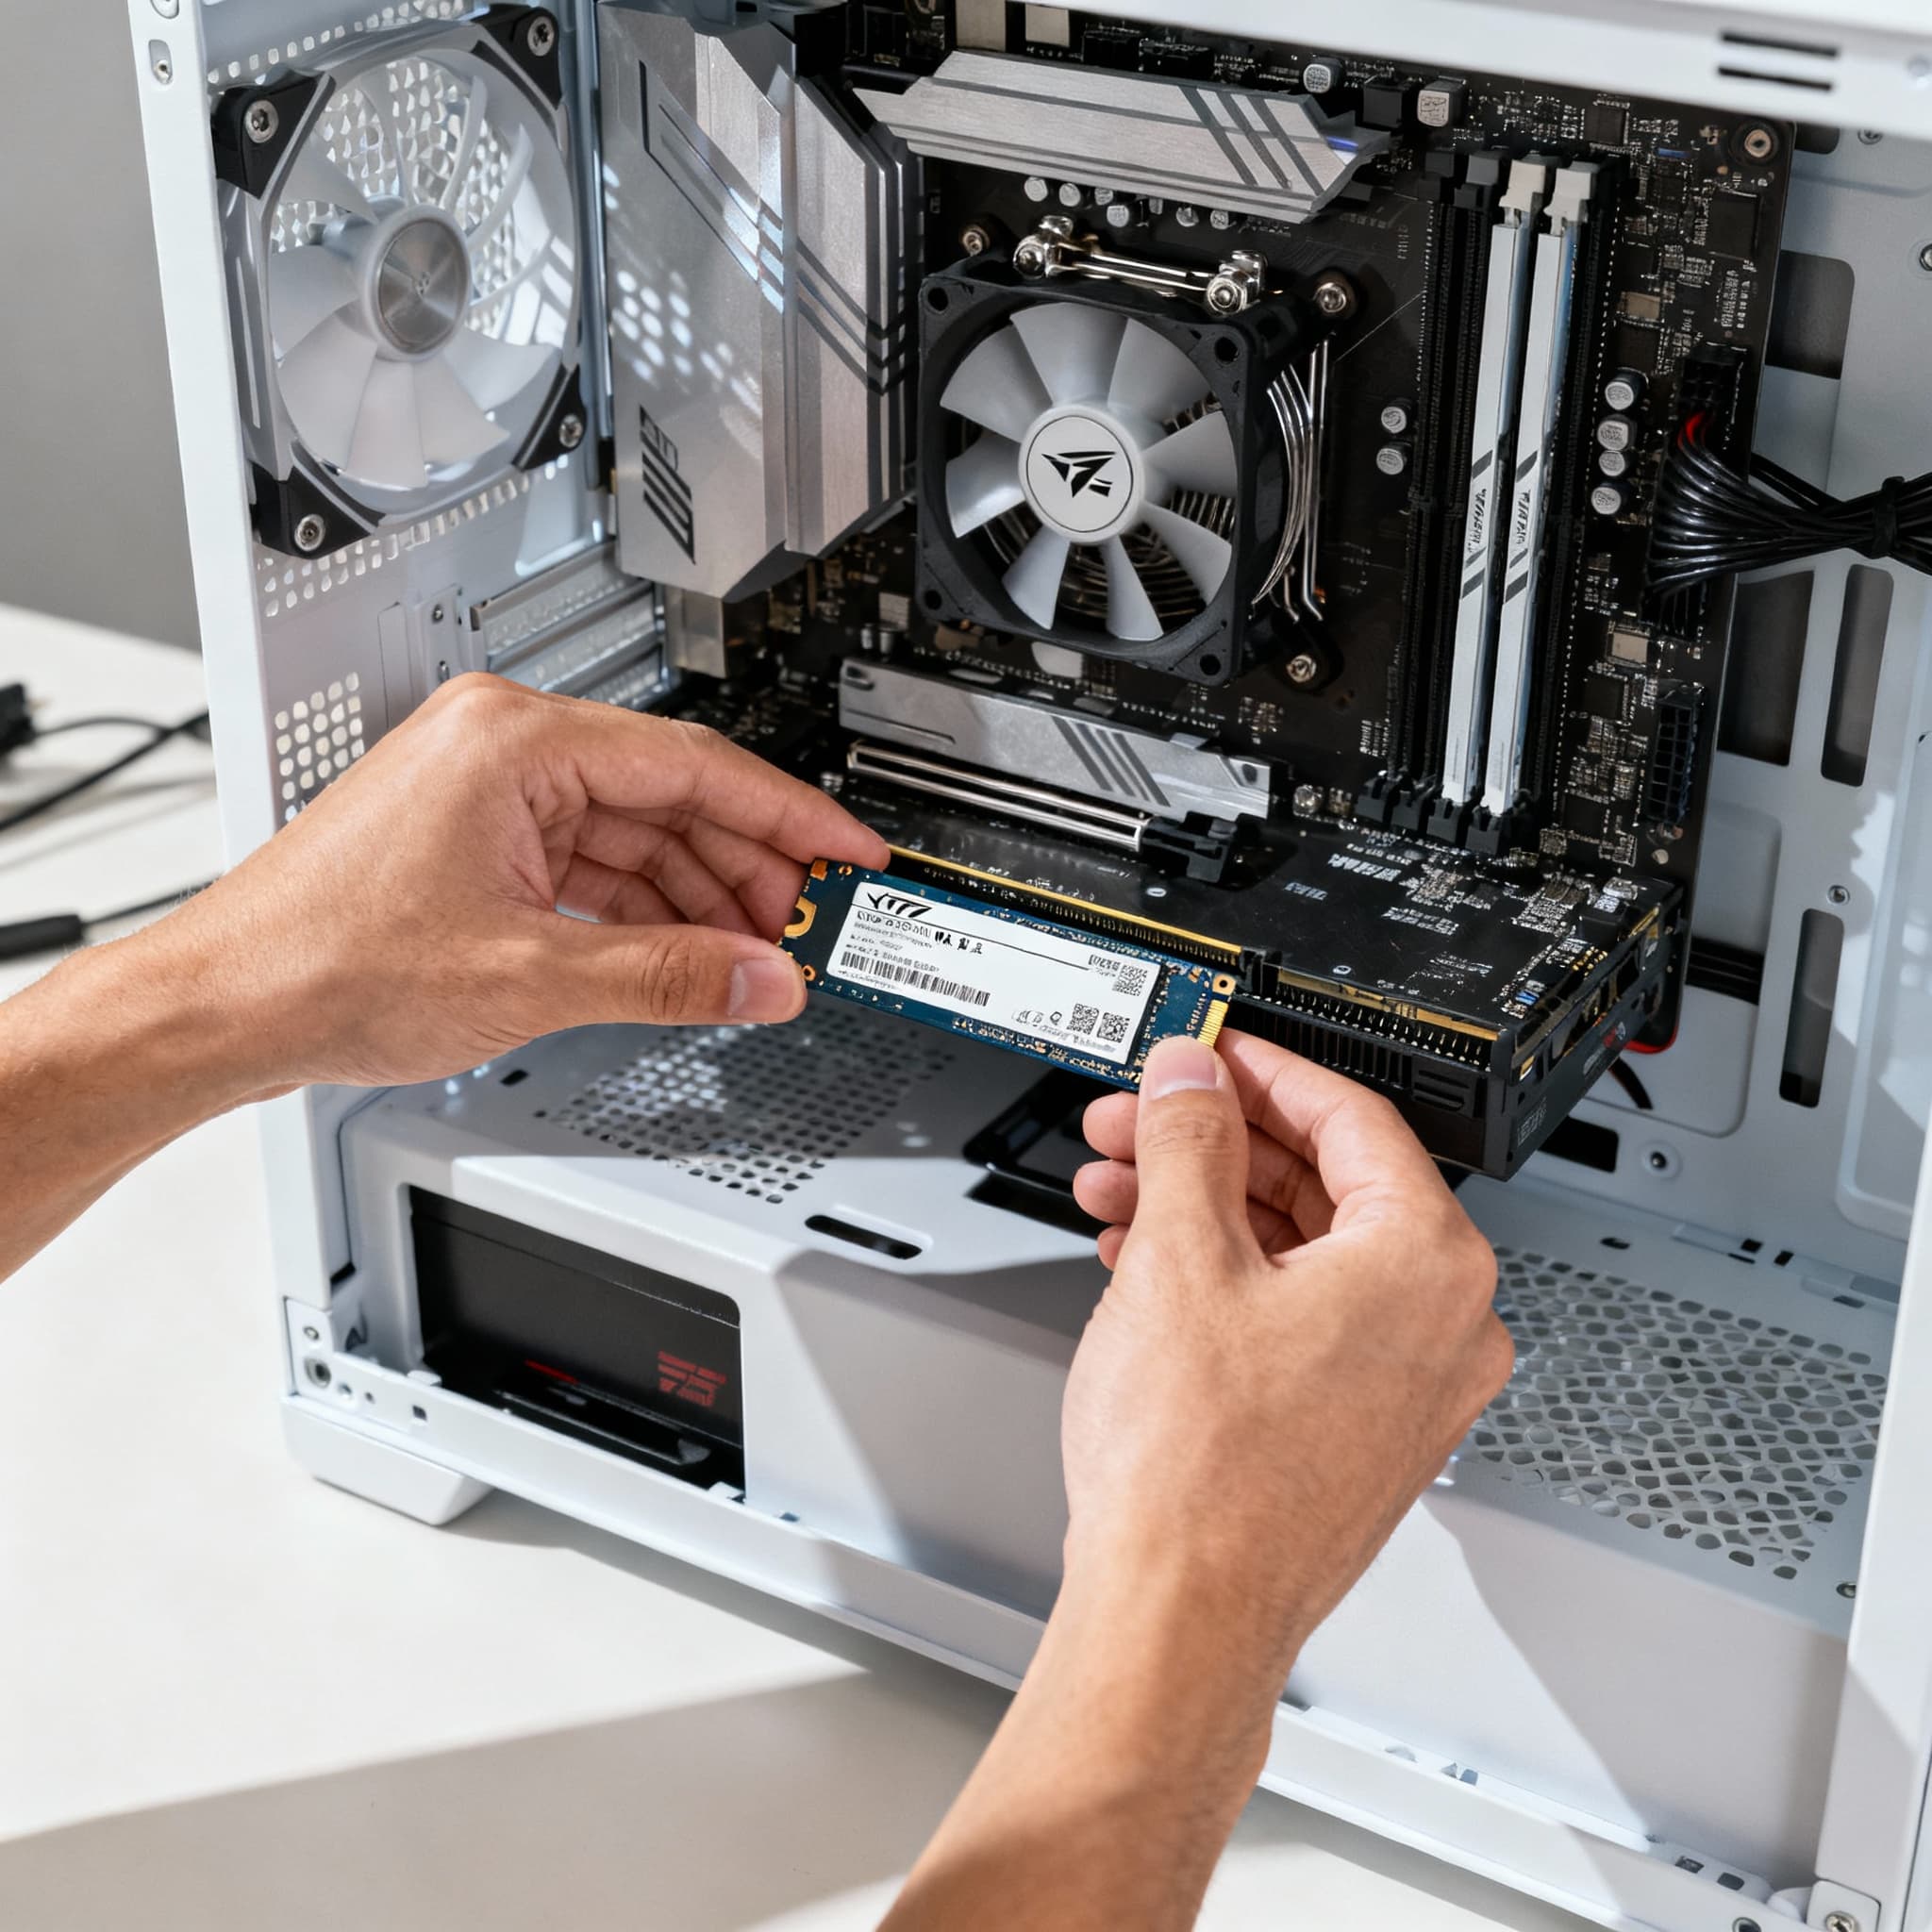
- Install Storage Drives (SSD/HDD) →
Mount your SSD or HDD in the designated slots or trays. Connect SATA cables (for SATA drives) or plug in NVMe drives directly on the motherboard. Storage installation ensures your games, apps, and files will run fast and reliably - it’s where your digital world lives.
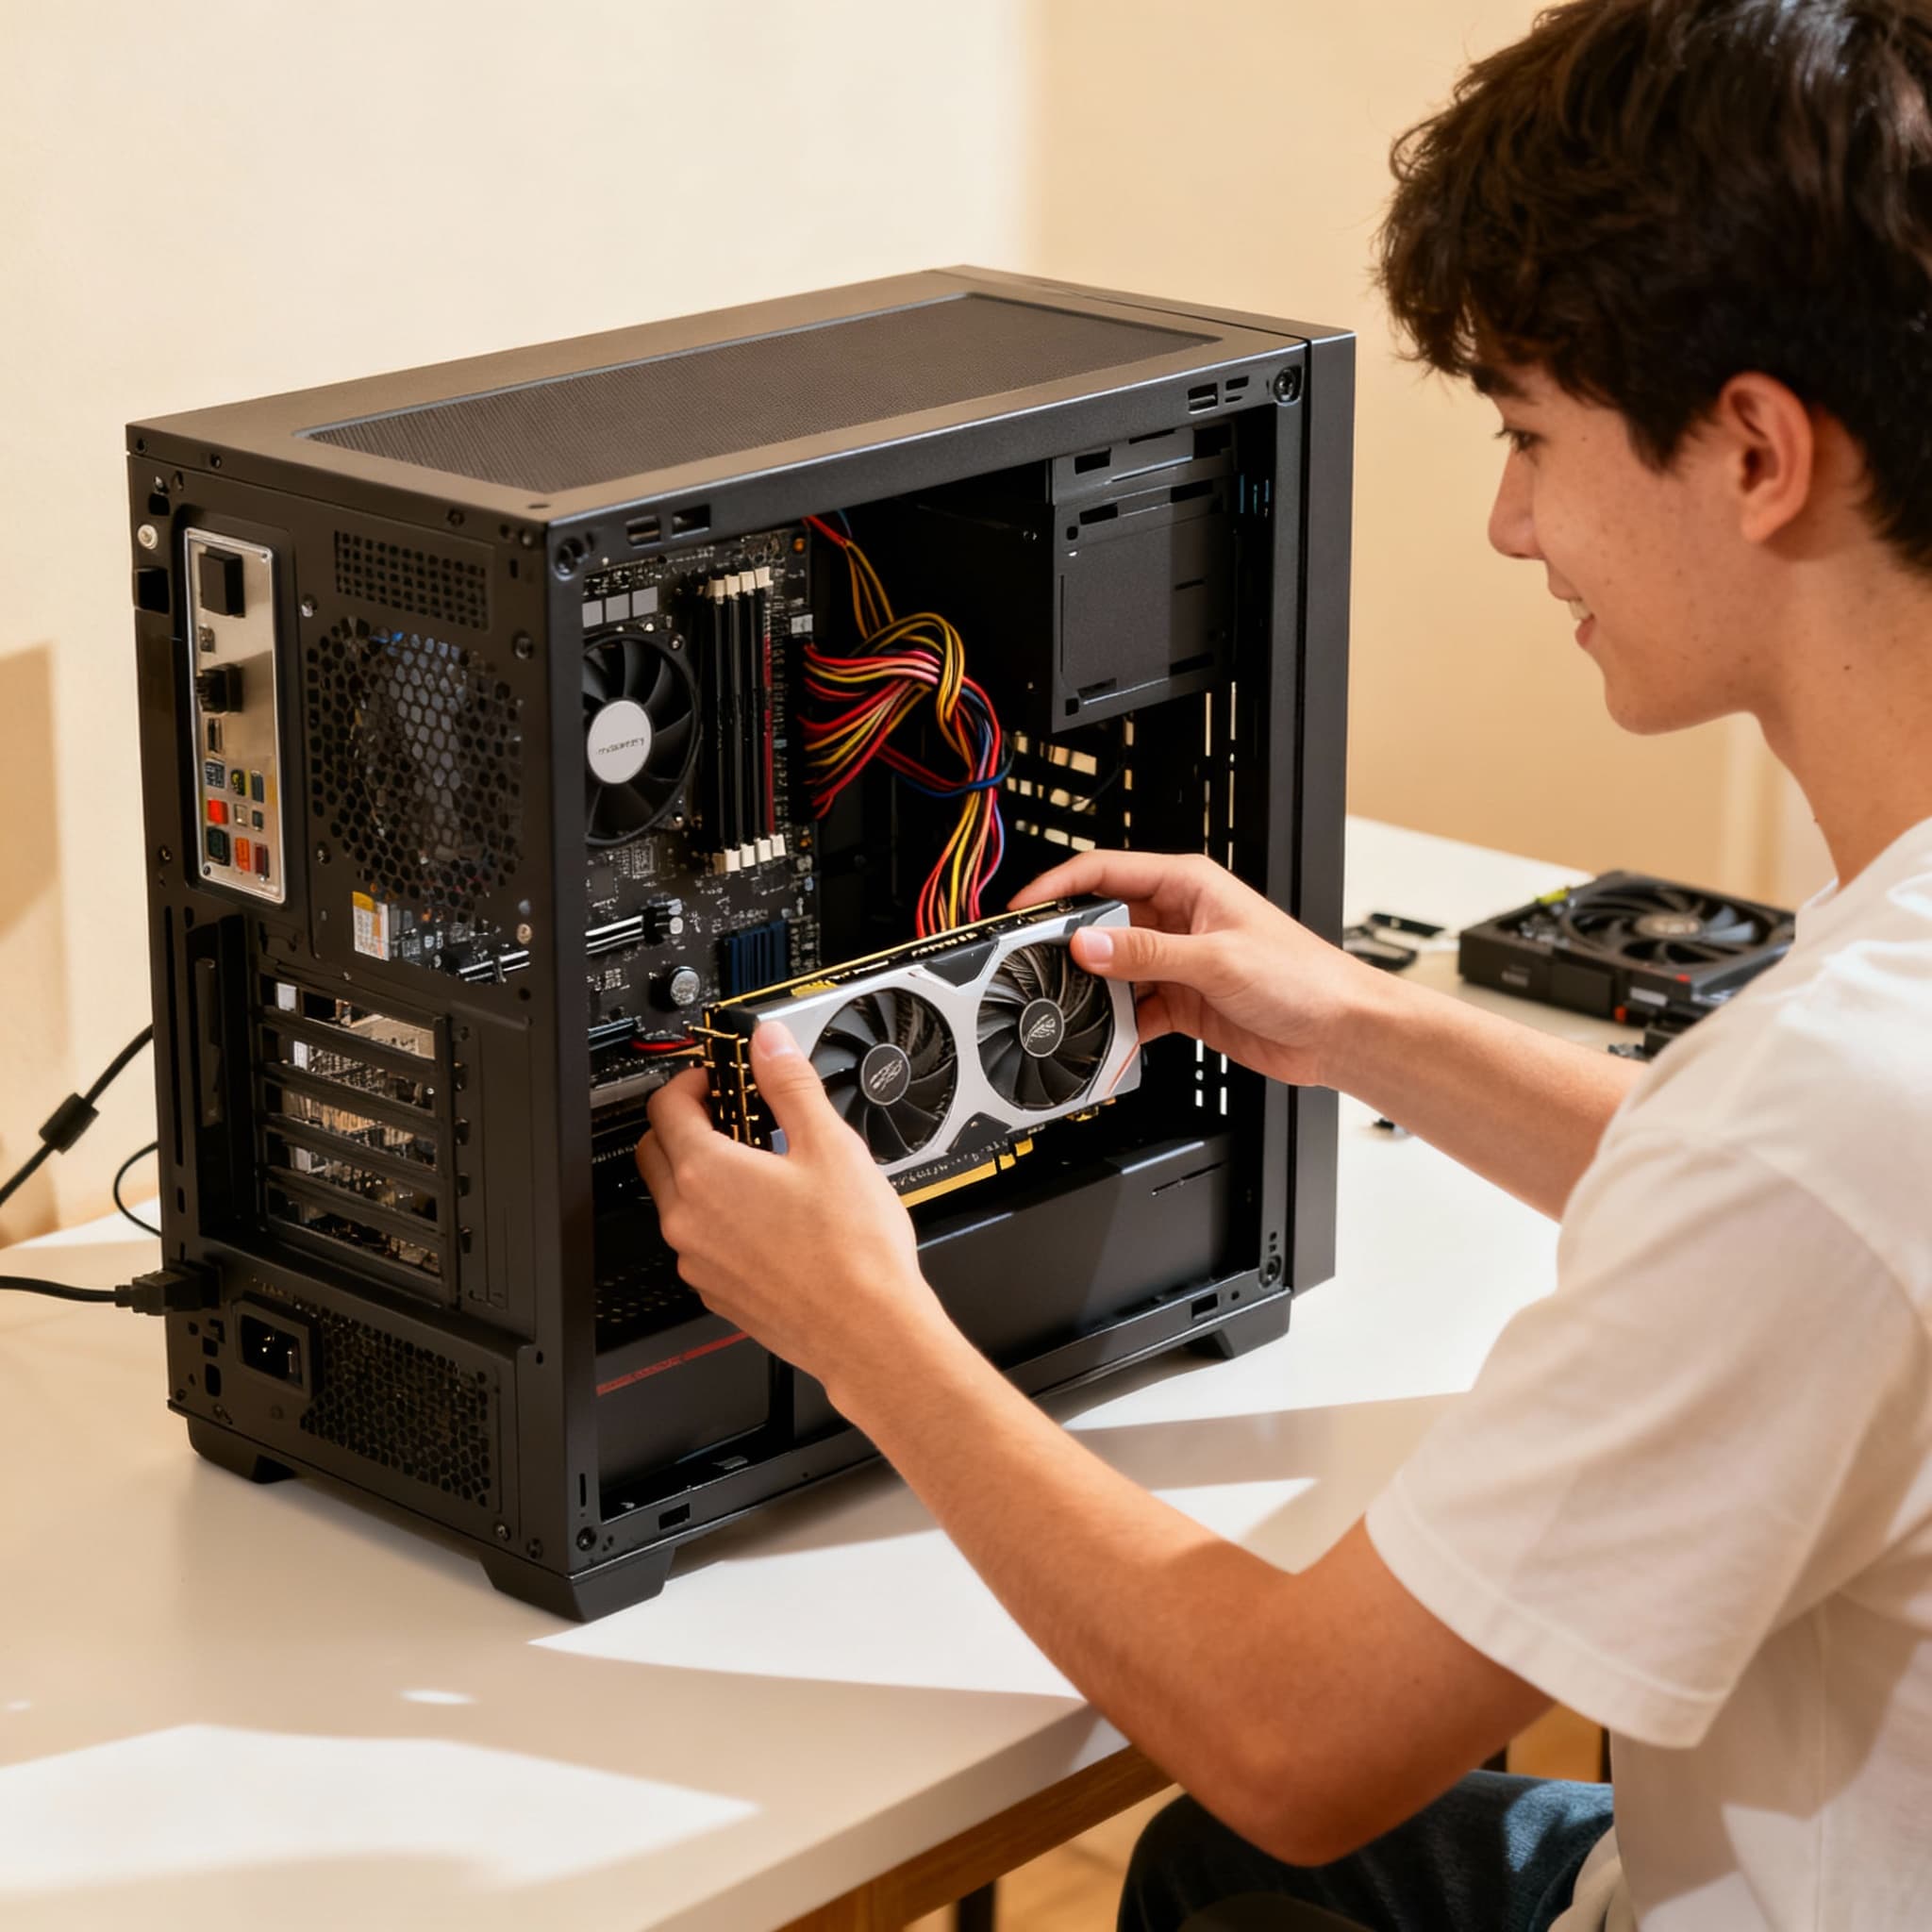
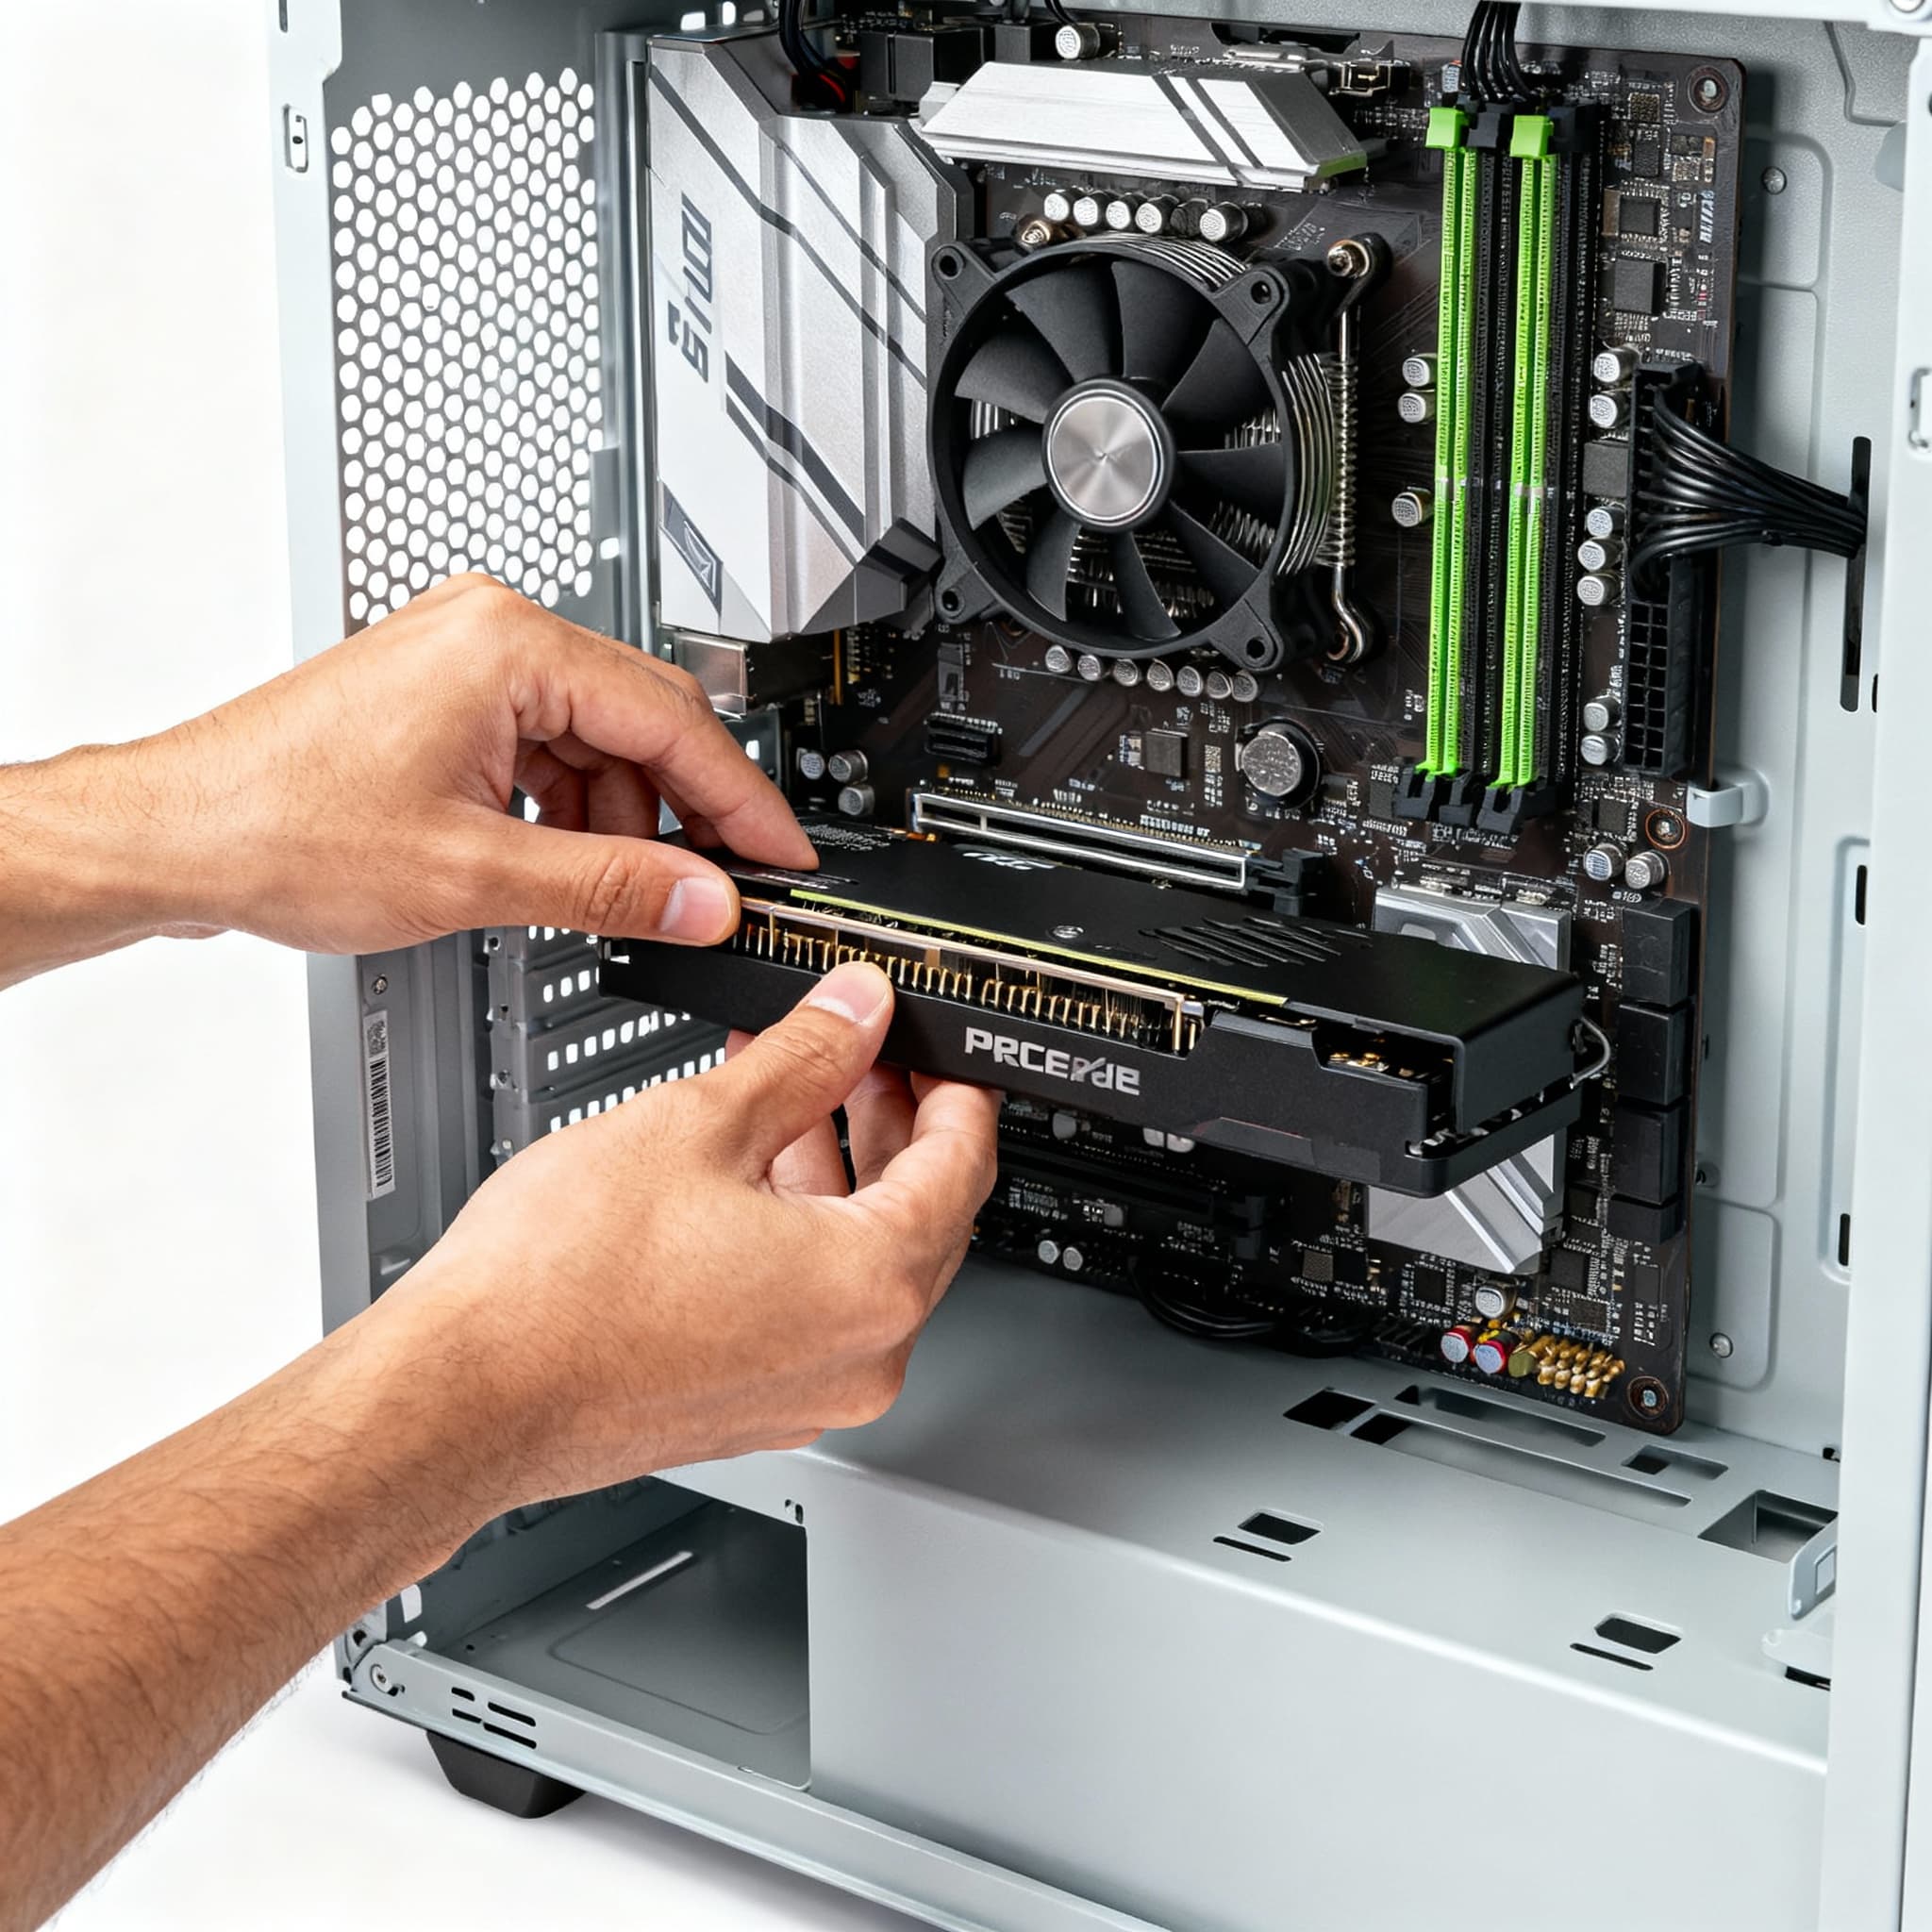
- Install the GPU →
Insert your graphics card into the PCIe slot on the motherboard and secure it with screws. Connect PCIe power cables from the PSU if needed. The GPU brings your games to life - it’s the most visually rewarding step. That first peek of your card in place is always exciting for a gamer.
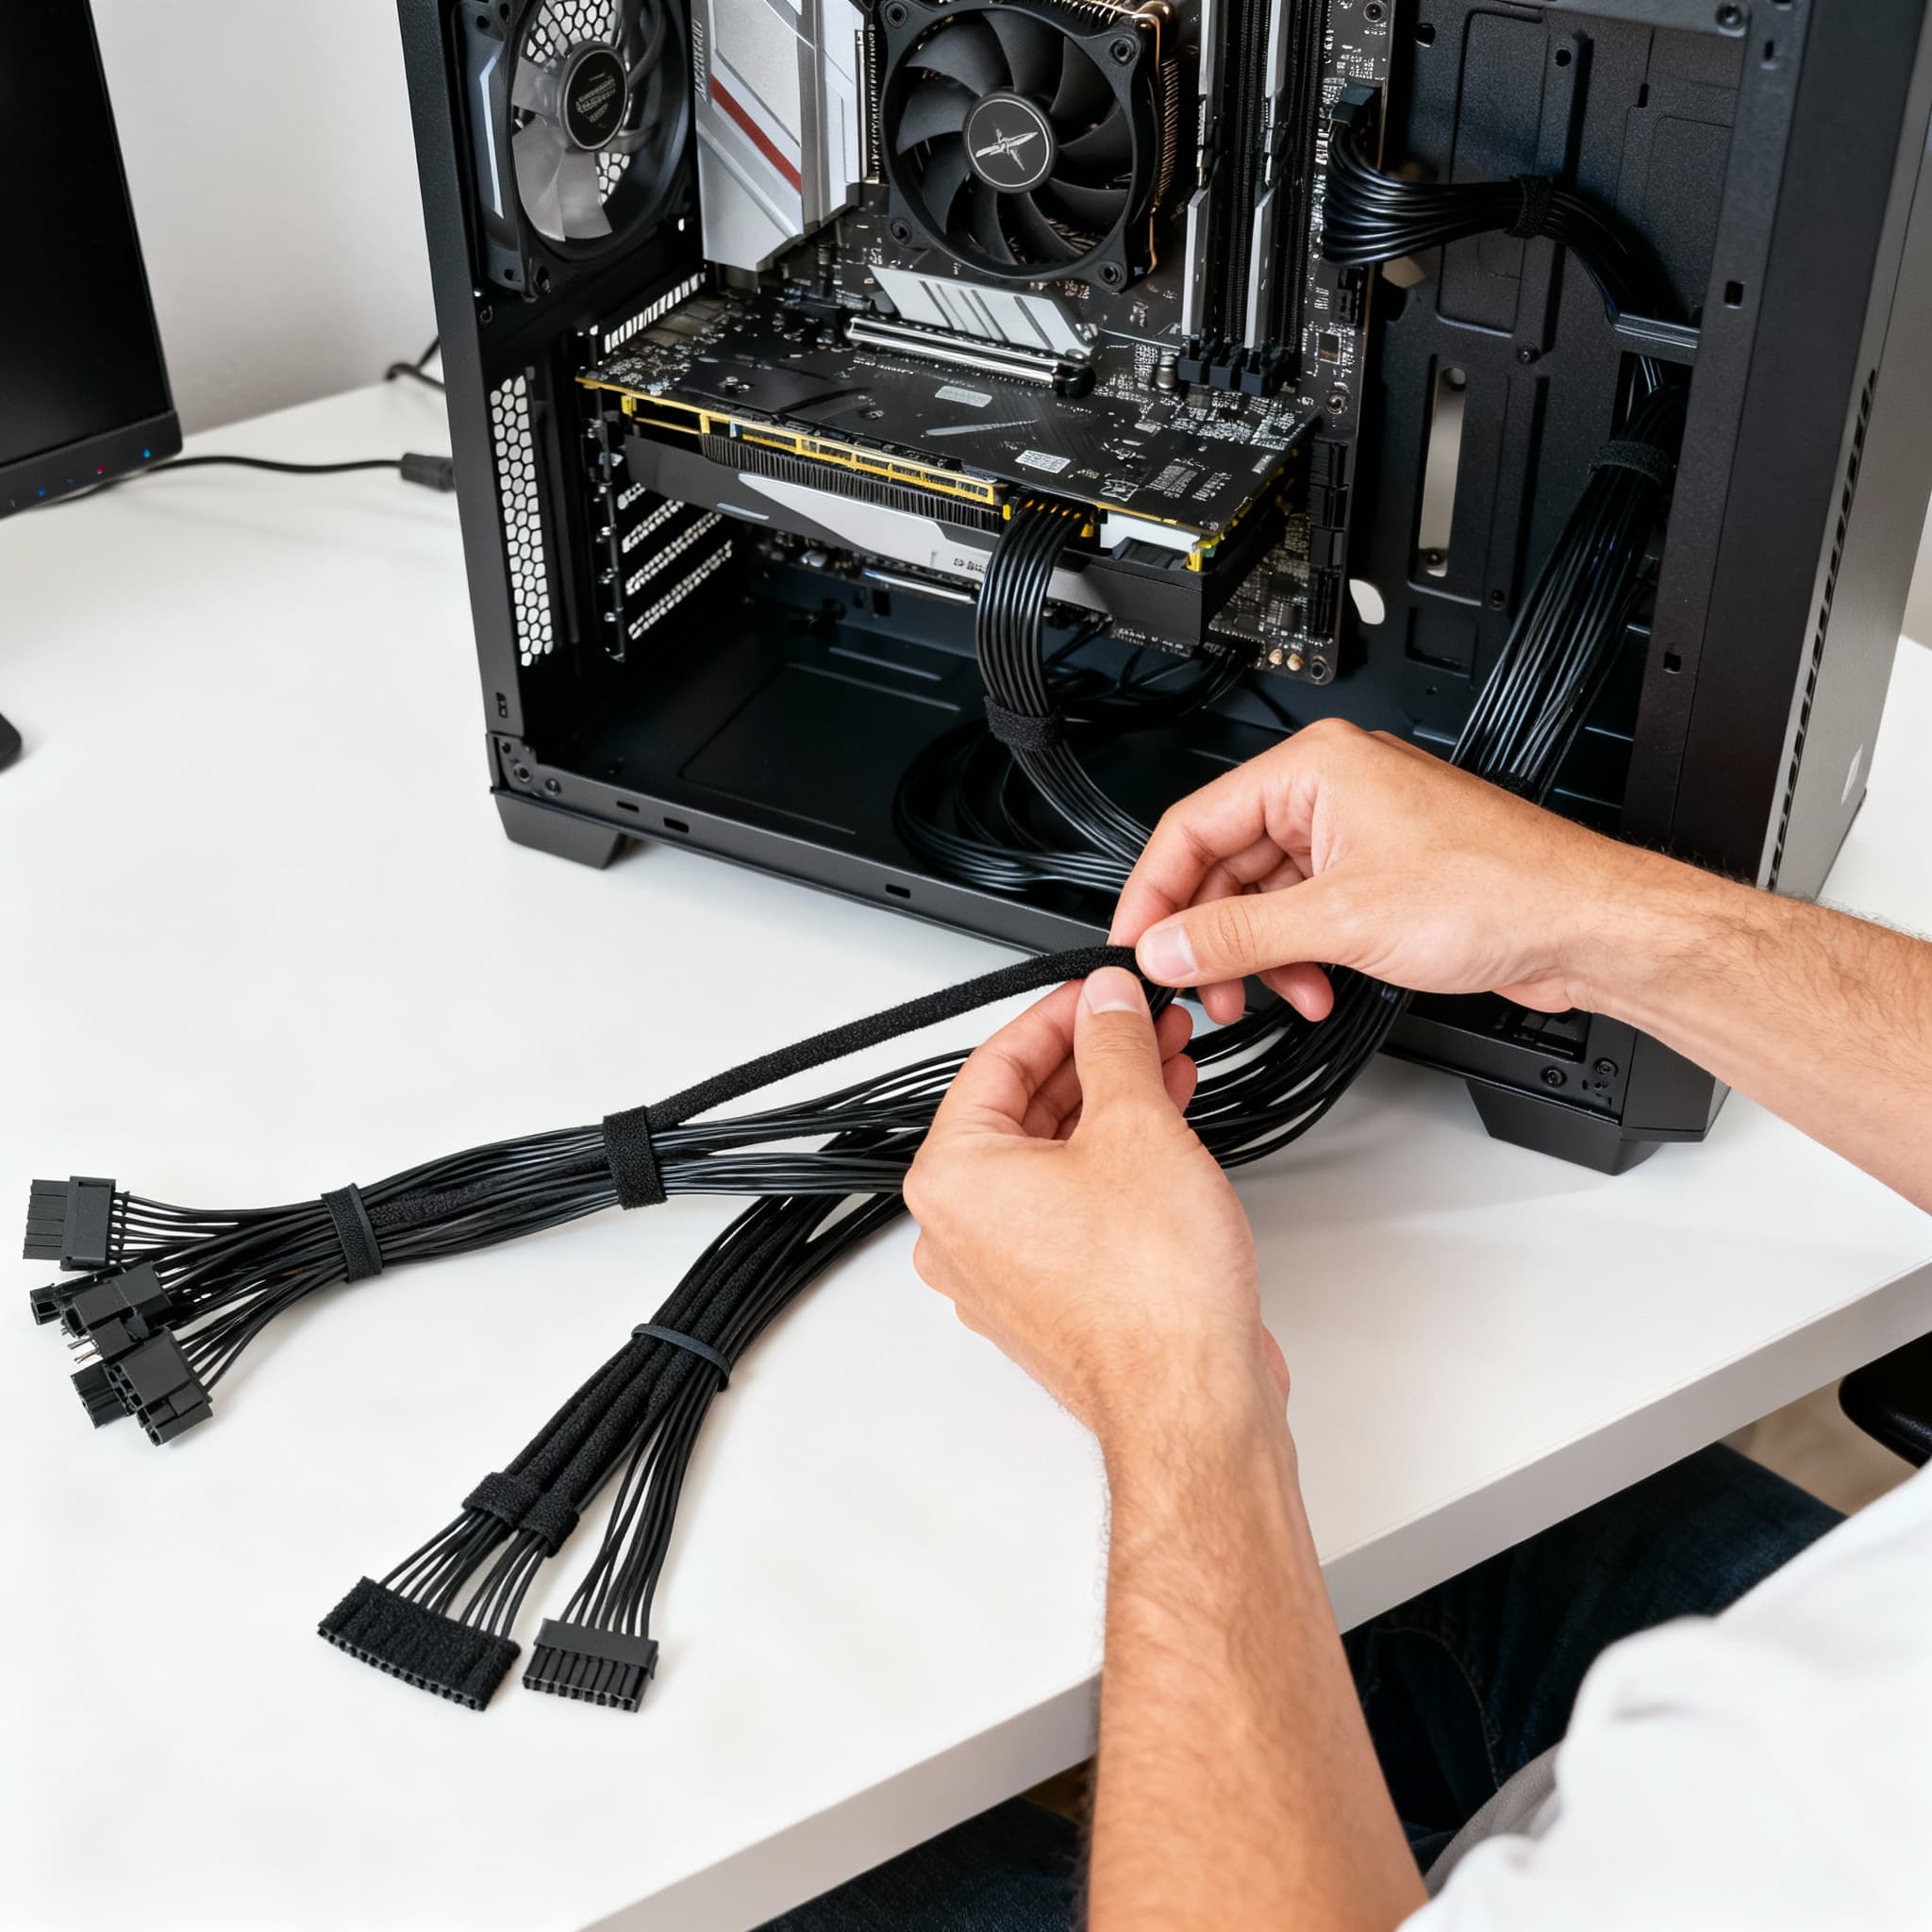
- Connect the PSU and Manage Cables →
Plug in the main power cables to the motherboard, CPU, GPU, and drives. Use cable ties or Velcro straps to tidy the wires. Proper cable management improves airflow, cooling efficiency, and aesthetics. A clean interior makes future upgrades easier and your setup look pro-level.
- Final Checks and Power-On →
Double-check all connections, screws, and component placements. Connect your monitor, keyboard, and mouse. Power on the system - BIOS should display, and fans should spin smoothly. That moment when your rig boots for the first time is pure excitement - the reward for patience and careful work.
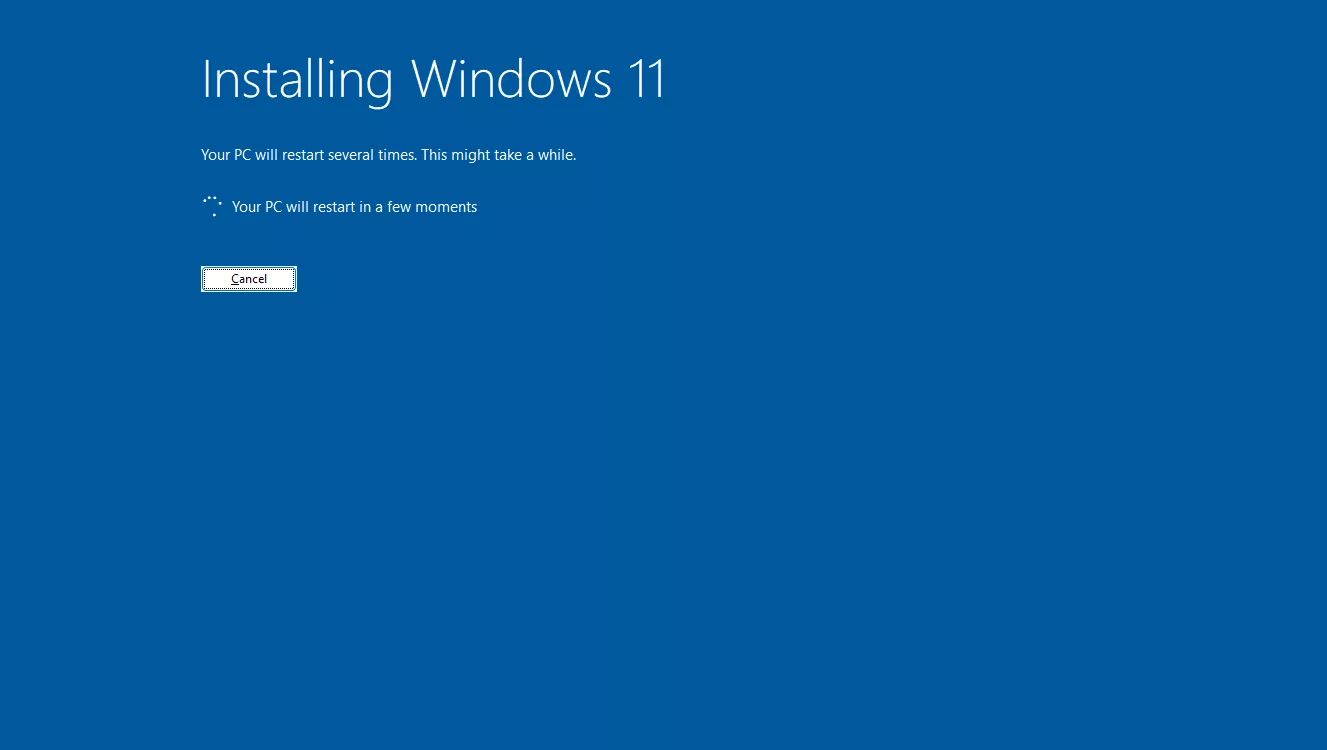
- Install Operating System and Drivers →
Install your OS (Windows/Linux) and all necessary drivers for GPU, motherboard, and peripherals. This ensures your PC runs stable and performs optimally. Watching your system come alive with full functionality is the final satisfying step in building your dream gaming rig.
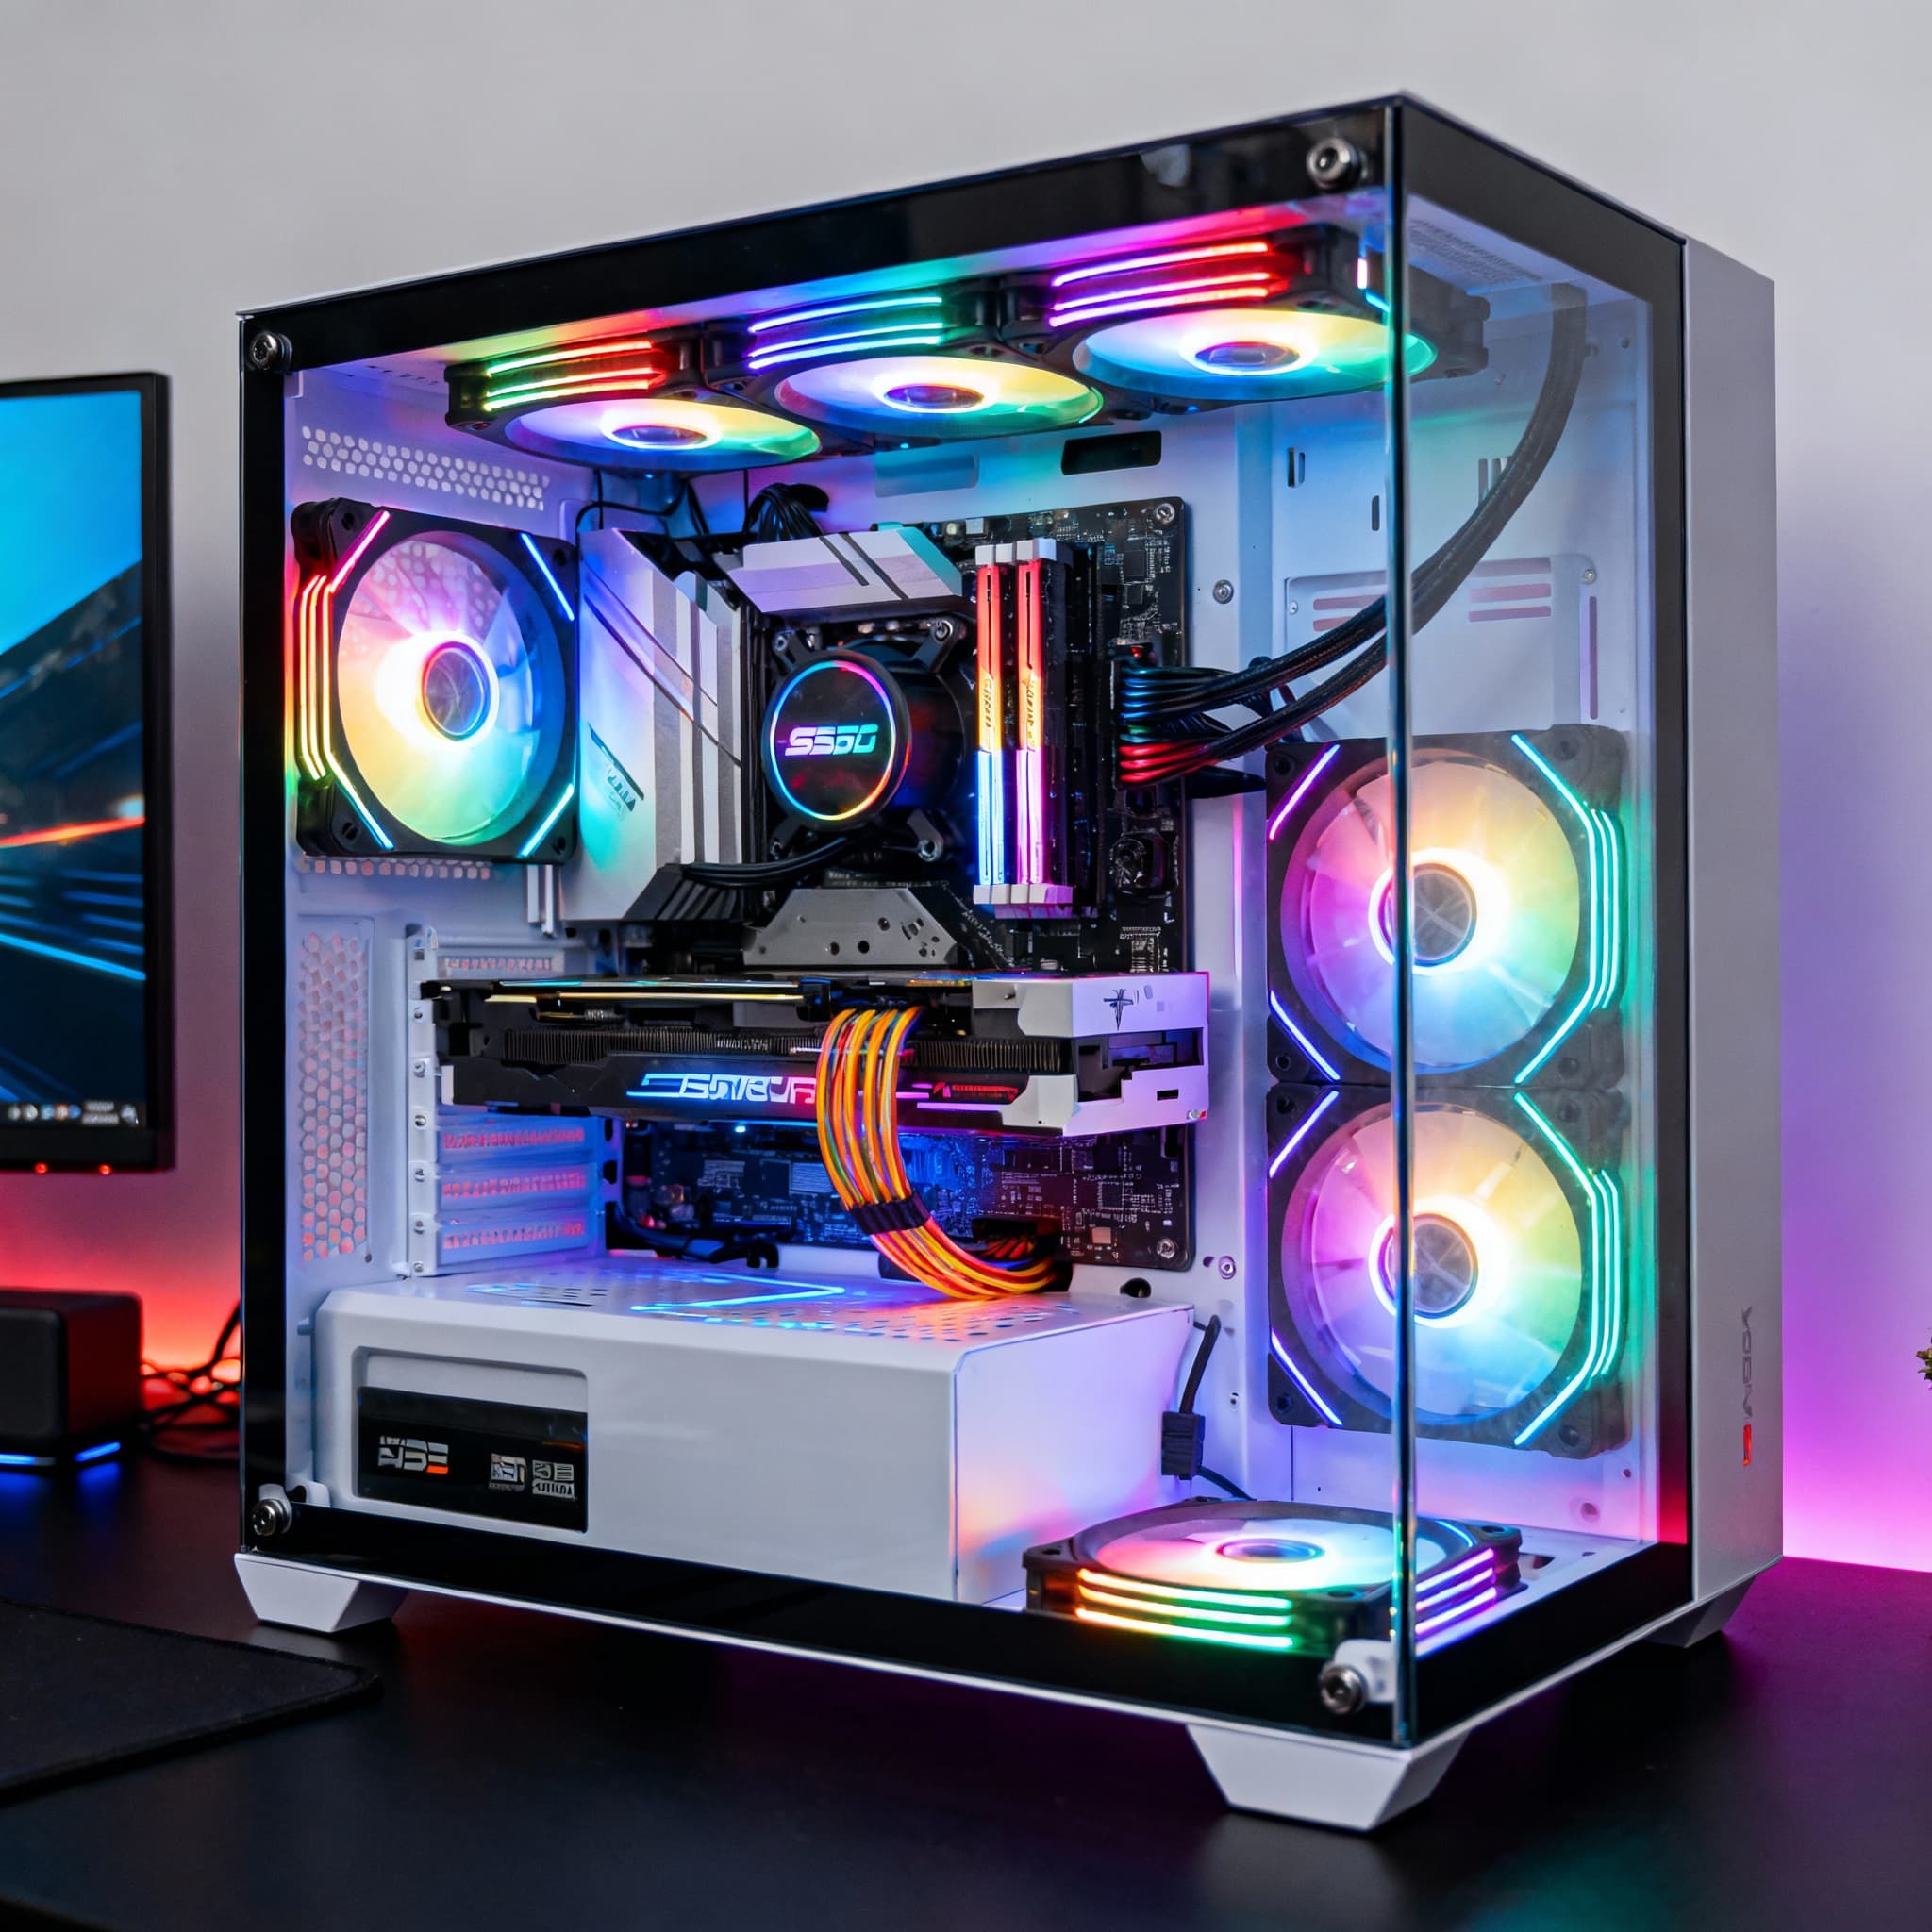
- Personalize and Optimize Your Setup →
Add RGB lighting, customize fan curves, and organize your desk for ergonomics. This is where your PC becomes truly yours - reflecting your personality, style, and gaming vibe. Enjoy the pride of a custom-built rig that looks and feels like a professional setup.
FAQs
Final Thoughts 💭
Building your own gaming PC is both a technical journey and an emotional experience. The satisfaction of seeing every part fit perfectly, hearing the first spin of fans, and knowing you created a machine tailored to your needs is unparalleled. Take your time, enjoy each step, and remember - this is your personal battlestation. Once it’s complete, you’ll not only have a powerful gaming rig but also the confidence and knowledge to maintain and upgrade it for years to come. 🖥️🎮✨